
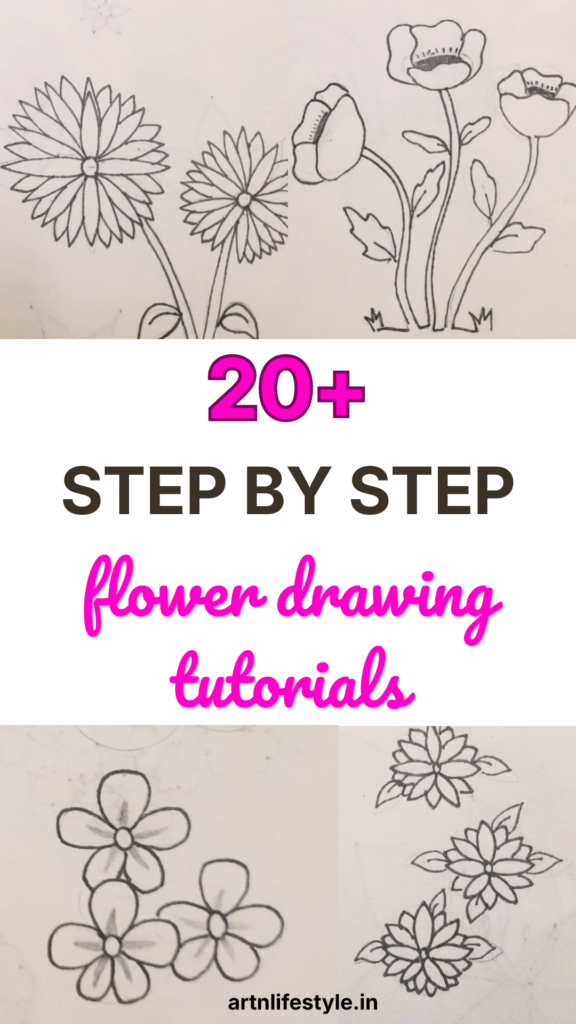
Simple drawing of flowers step by step
*This post may contain affiliate links. This means when you click on a link and make a purchase we may earn a commission at no additional cost to you. Our goal is to provide valuable and helpful content. Any commission made can help us maintain this site and provide more quality and helpful content for our readers.*
Introduction:
If you’re eager to master the art of drawing flowers step by step, here are some simple step by step guides that break down this process. By focusing on basic shapes and gradually adding details, you can create beautiful floral illustrations. These step-by-step tutorials provide a structured approach to capturing the delicate beauty of flowers on paper.
Simple drawing of flowers step by step
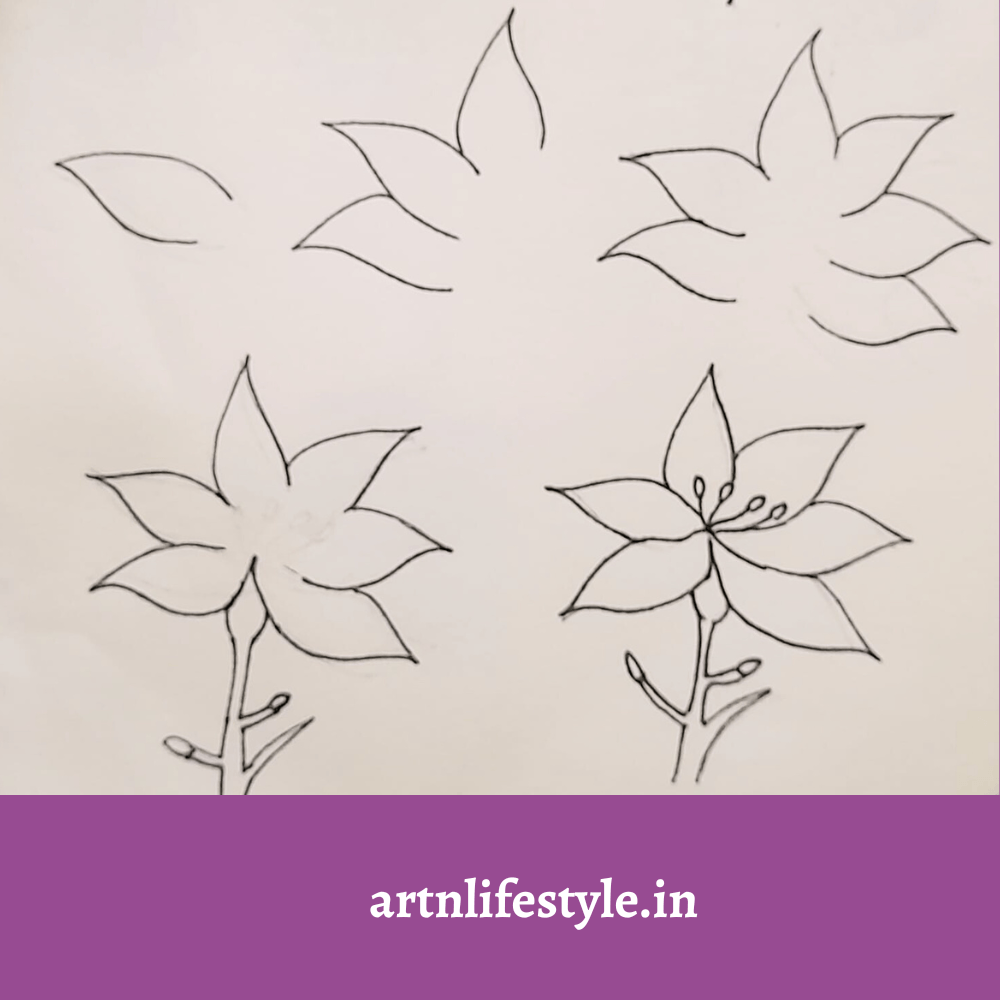
1. Hibiscus Flower
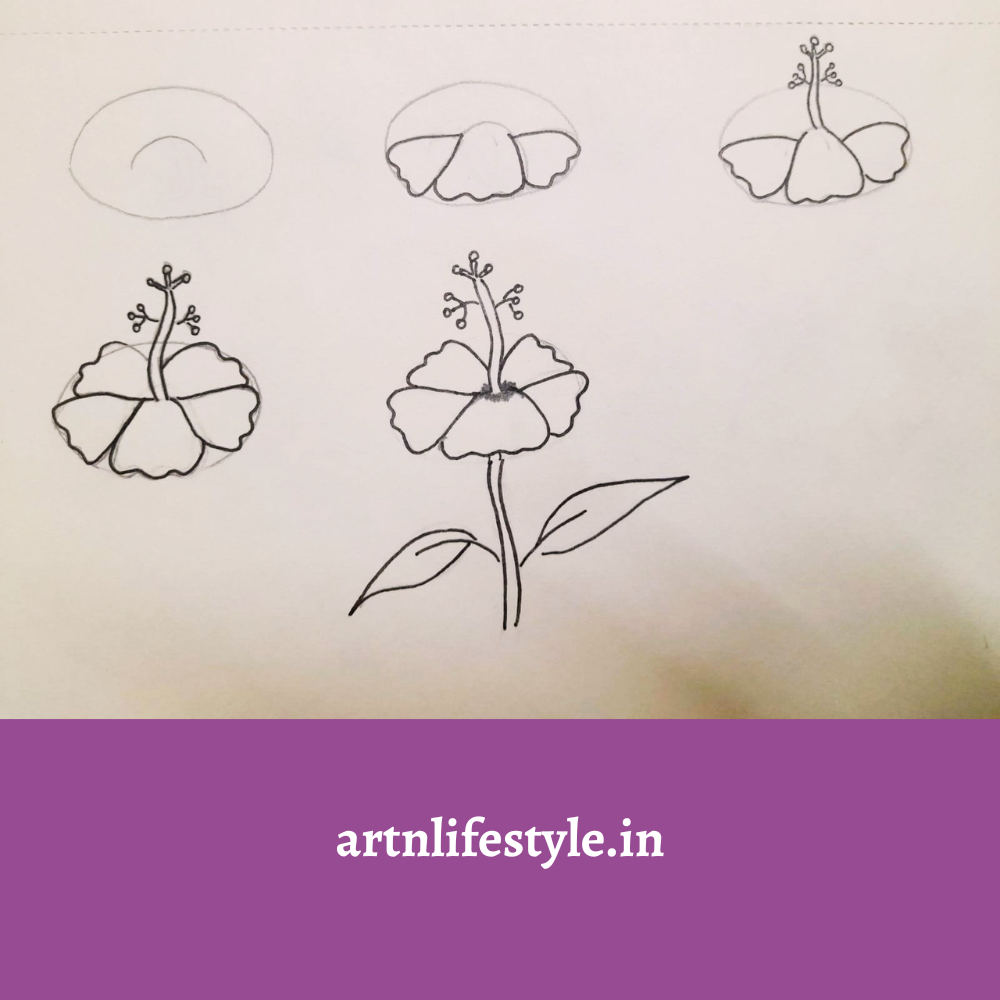
Start by drawing an oval and a curved line inside it. Add three large petals—one in the center, two on each side. Draw two more petals behind and add the long stigma with small circles at the tip. Outline the petal edges and erase the oval. Finish by adding a stem and two simple leaves.
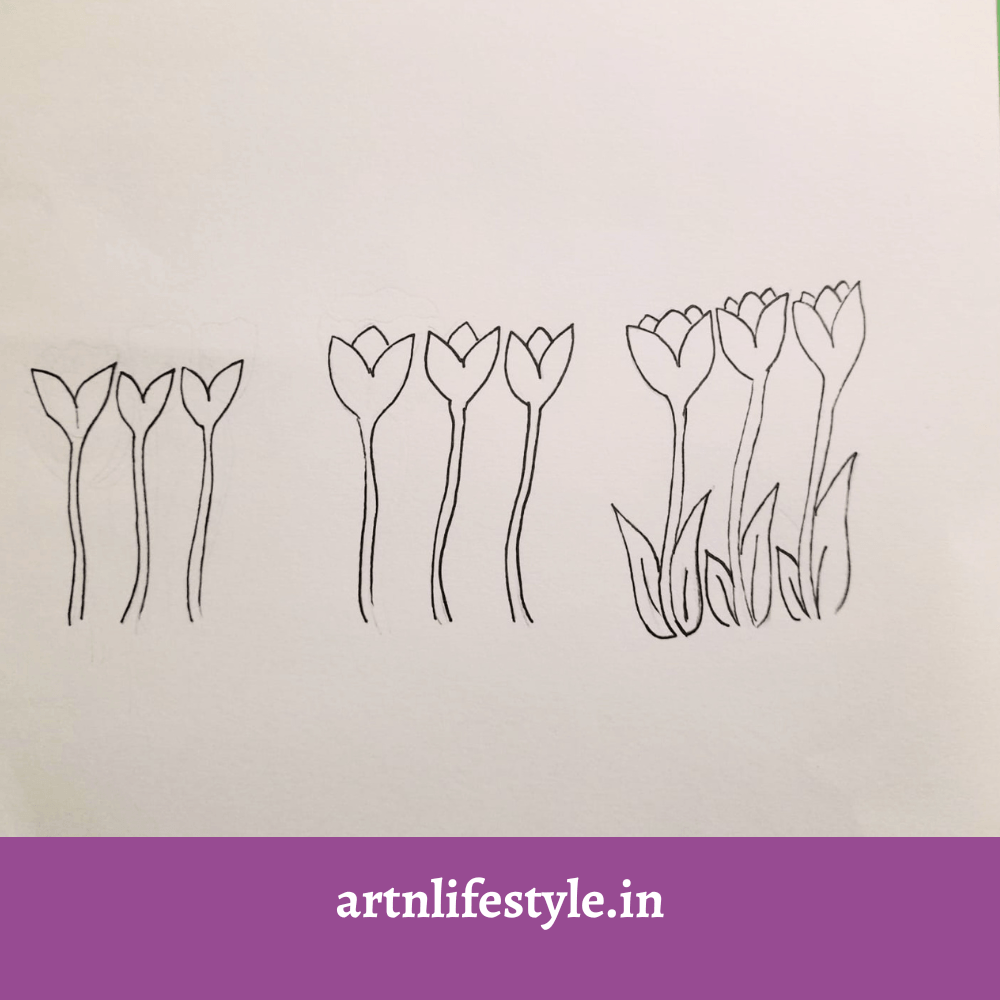
2. Tulip Flower
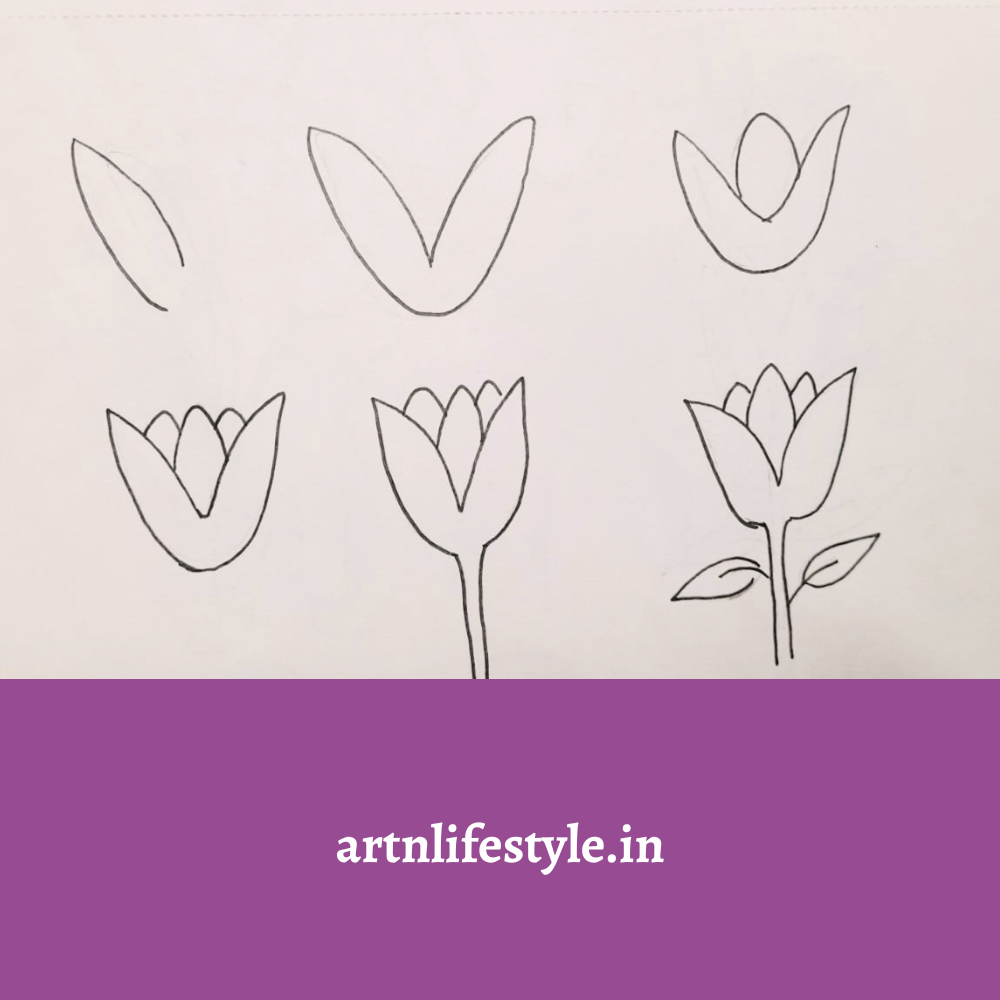
Begin with one petal shape on the left. Add a mirrored petal on the right to form a V. Draw a middle petal in between. Add a few more small petals behind and draw a stem. Complete the drawing by adding two small leaves on each side of the stem.
3. Rosebud

Start with a U-shape for the base. Close the top with a curved line to make a cup. Add a spiral inside the bud to show the rolled petal. Extend a vertical line down for the stem. Draw small leaves with pointed edges near the base of the flower.
4. Lotus Flower
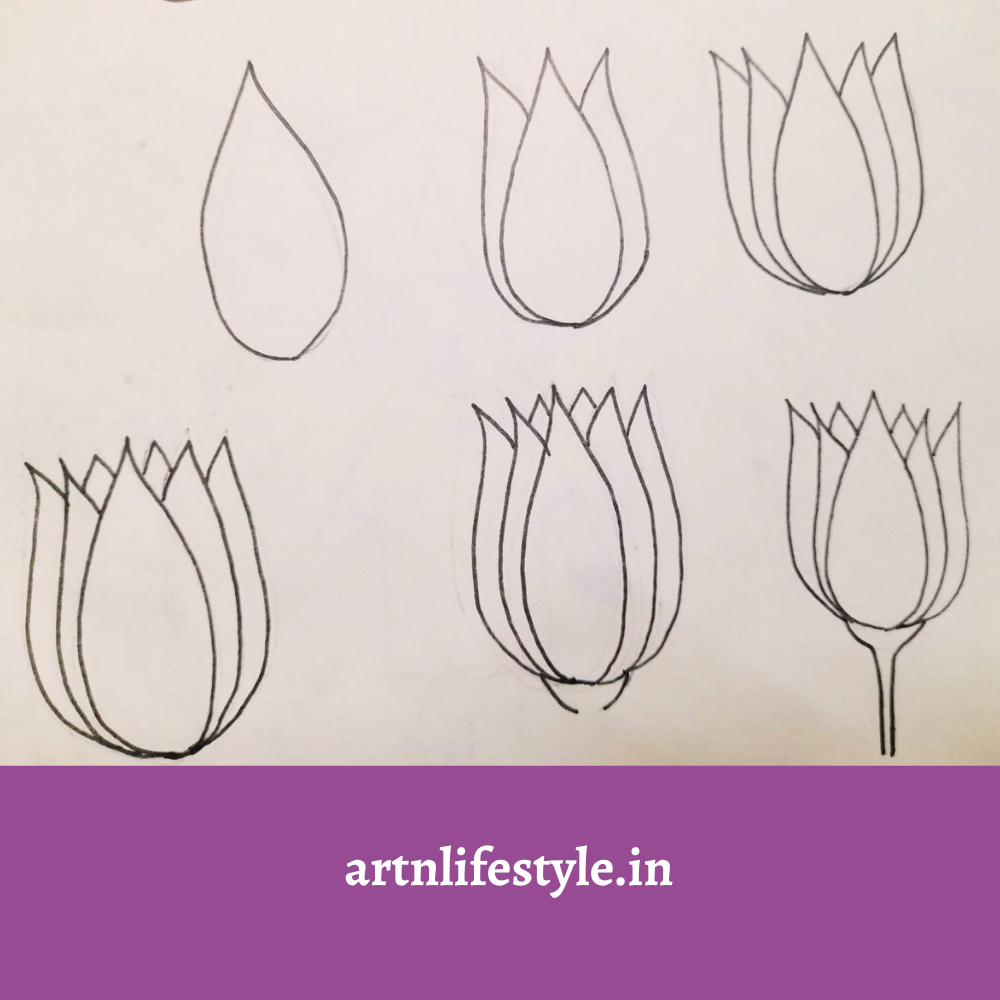
Draw a teardrop shape. Add overlapping petal shapes behind it, spreading out evenly. Continue layering petals in a circular way. Make sure the petals get smaller as they go behind. Add a small curved line at the base and draw a stem to complete the lotus.
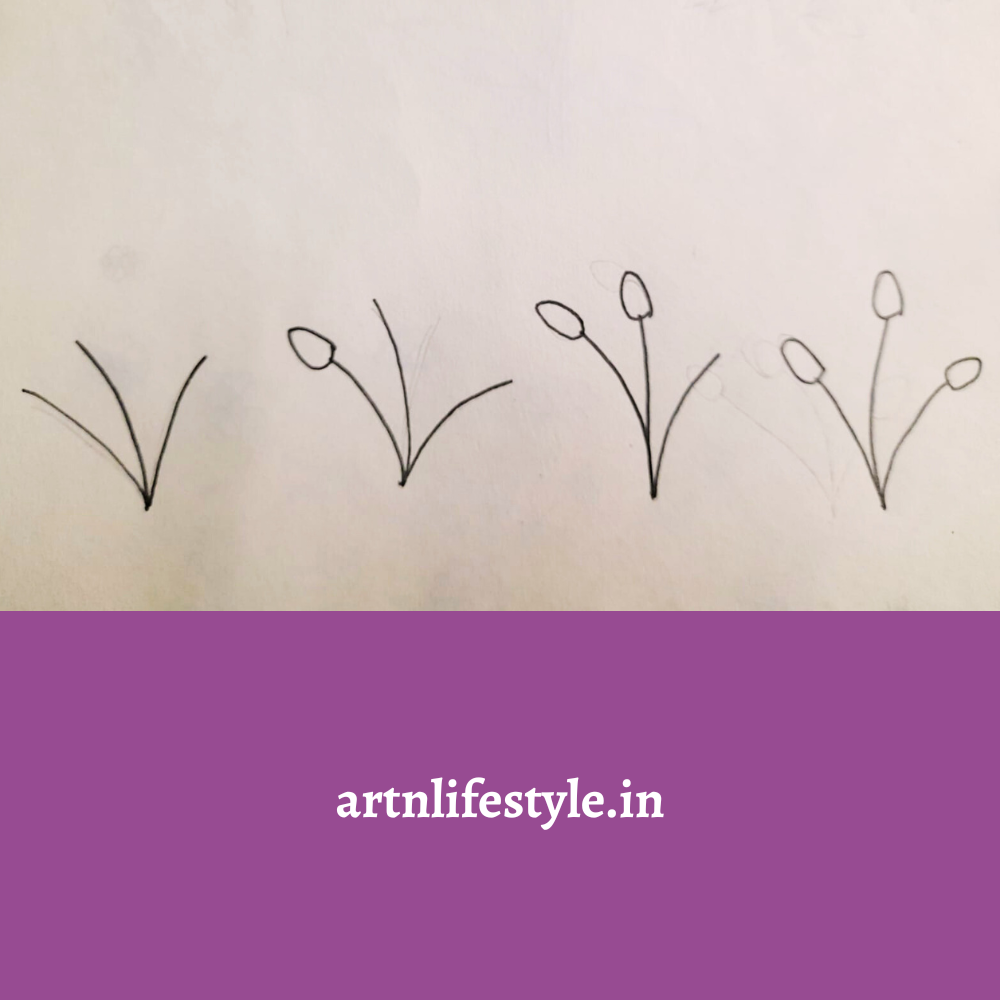
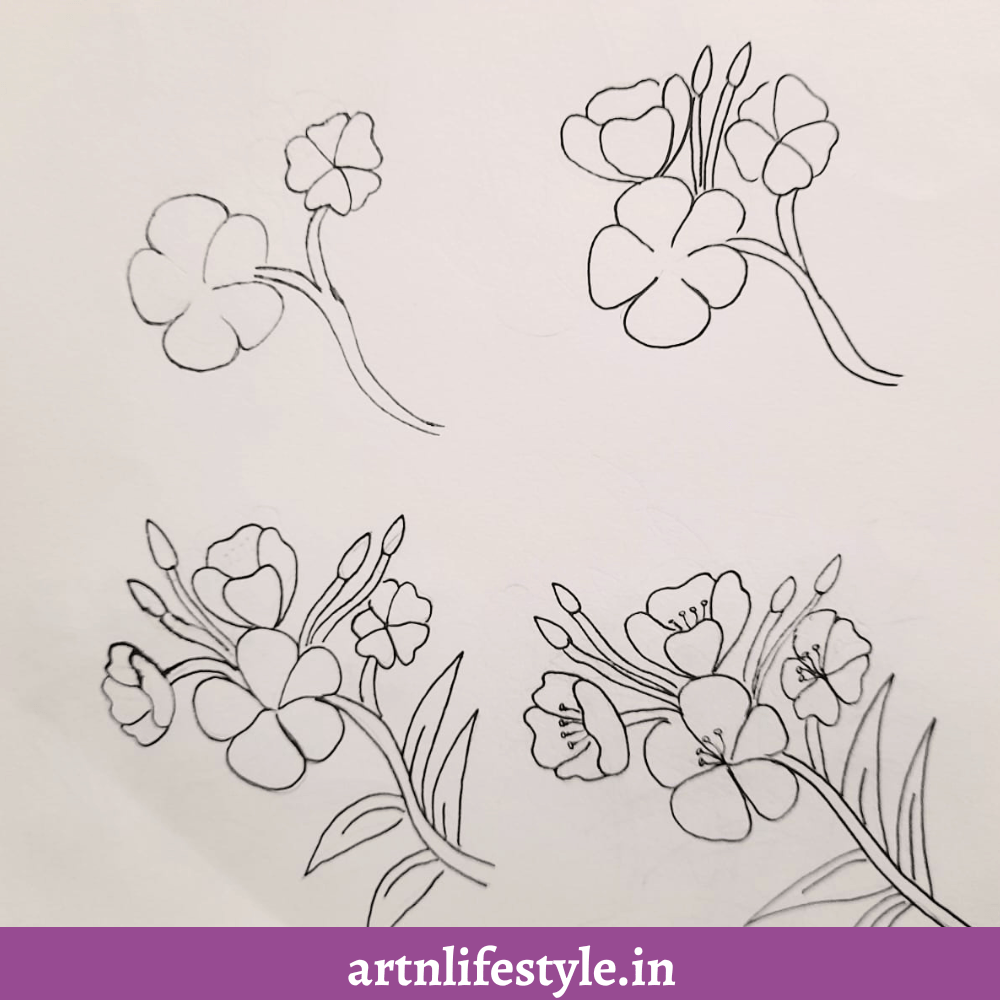
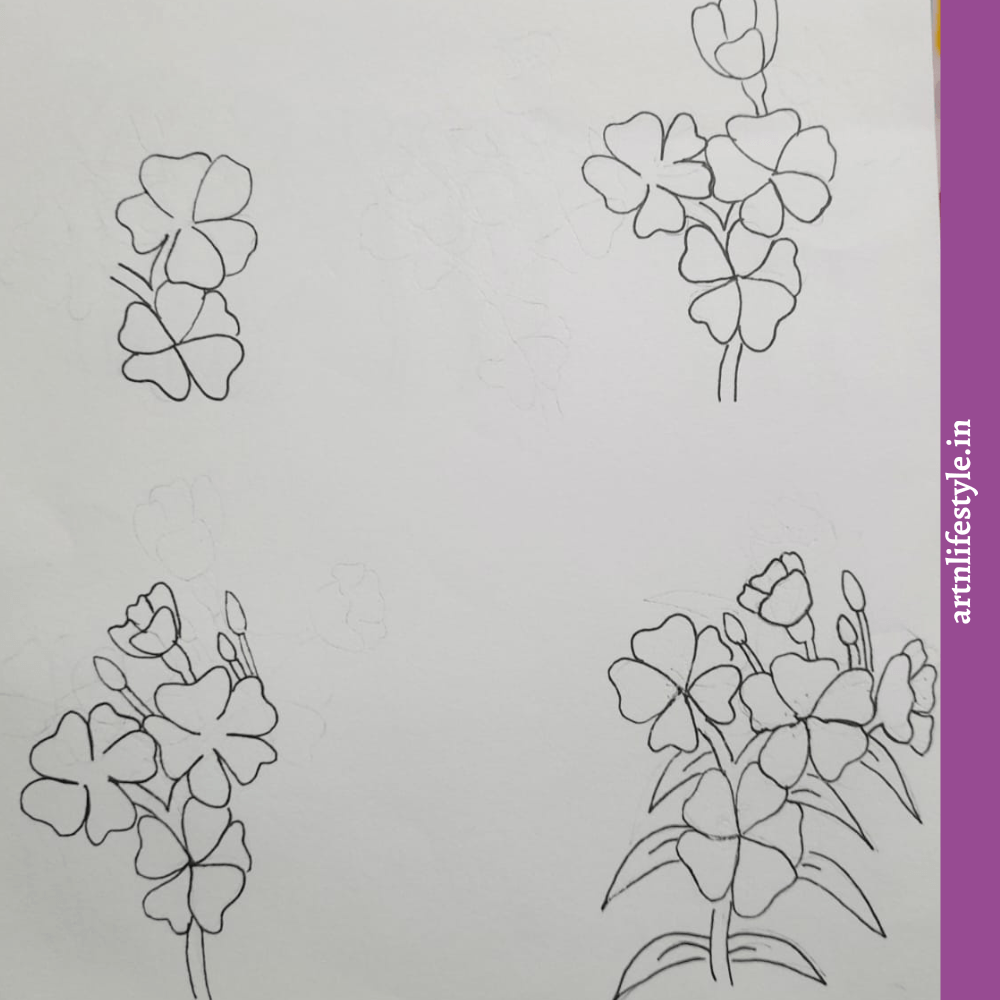
5. Poppy flowers
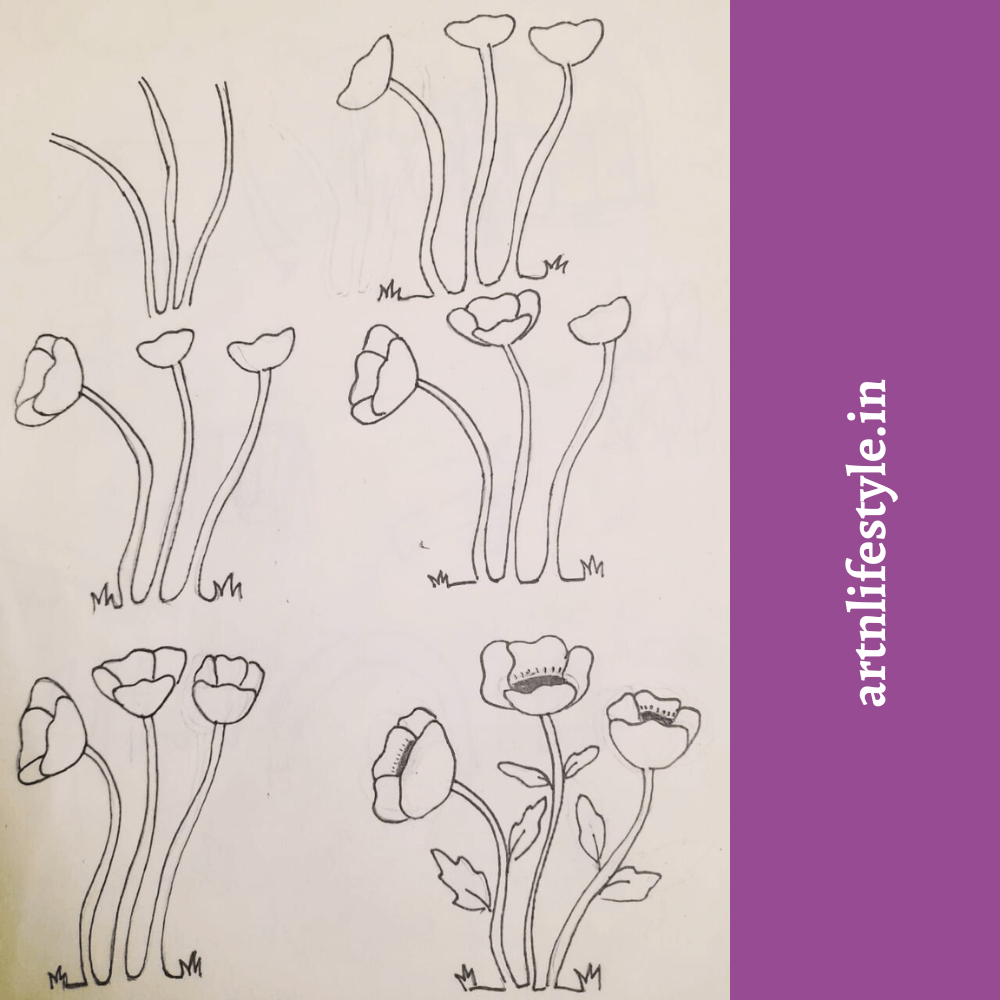
Start by drawing the flower’s stems. Next draw the flowers petal. Finally complete the sketch by drawing the leaves and the grass.
You might also like: 20+ Cute food drawing ideas for kids
6. Flowers in a Pot
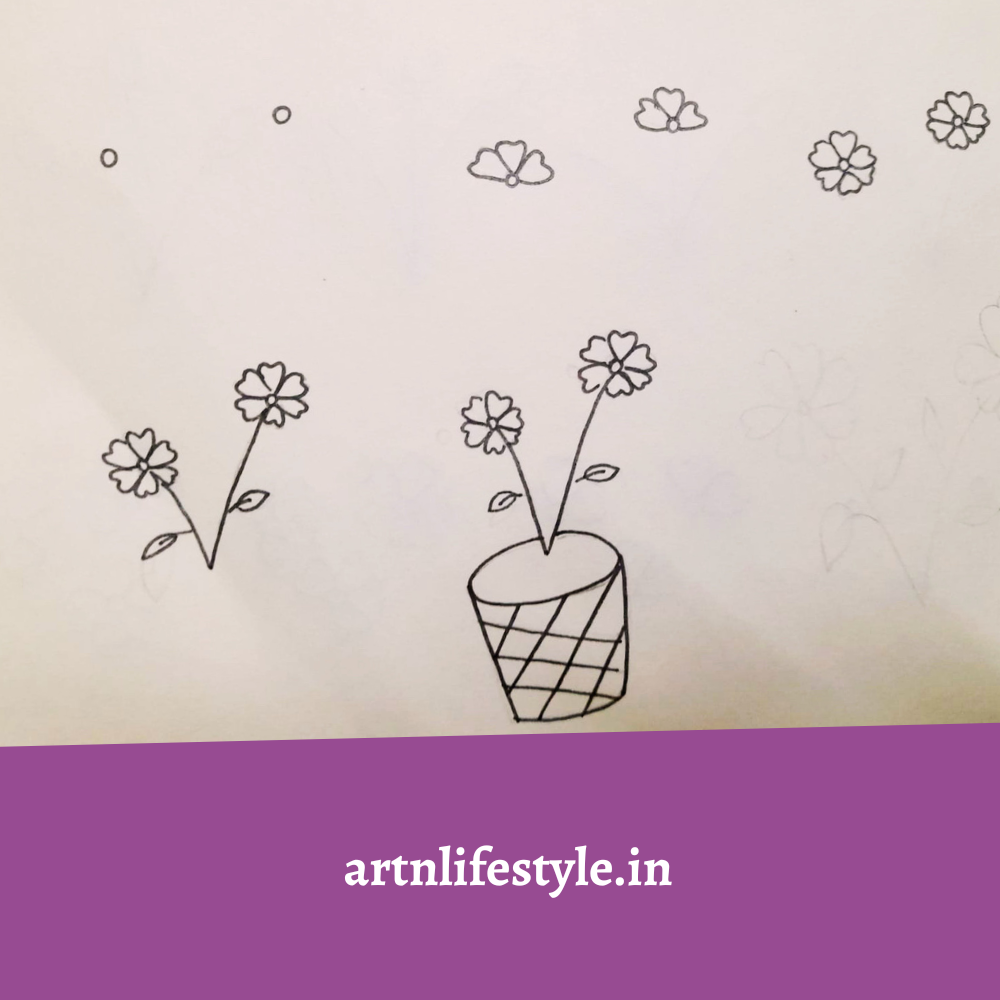
Start by drawing tiny circles for flower centers. Add heart-shaped petals around each center. Connect two flowers with slanted stems. Draw small oval leaves on the stems. Finish with a cylindrical flower pot and add crisscross lines for decoration.
7. Lily
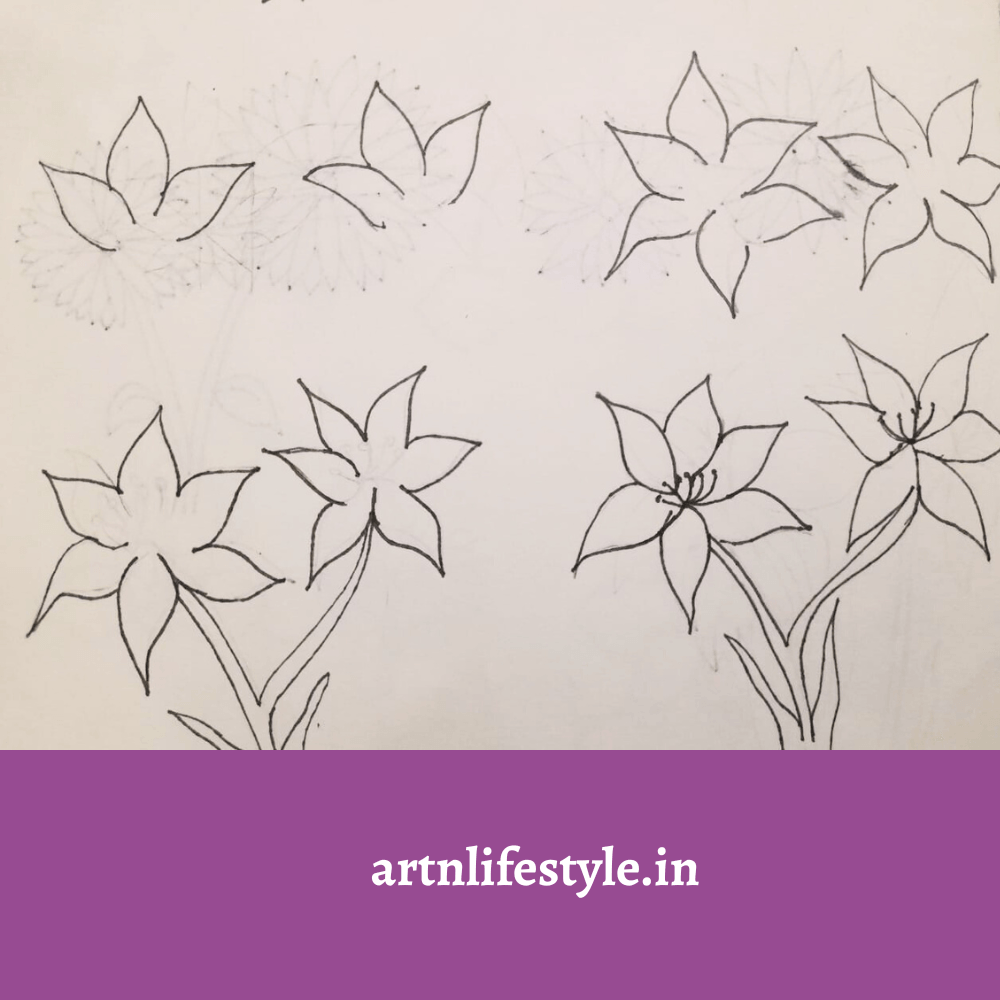
Start by drawing the upper 3 petals of the flower. Then draw the petals below. Next draw the flower stems and leaves. Finally draw the pistil.
You might also like: 35+ Easy and Cute valentines day drawing ideas
8. Sakura flowers
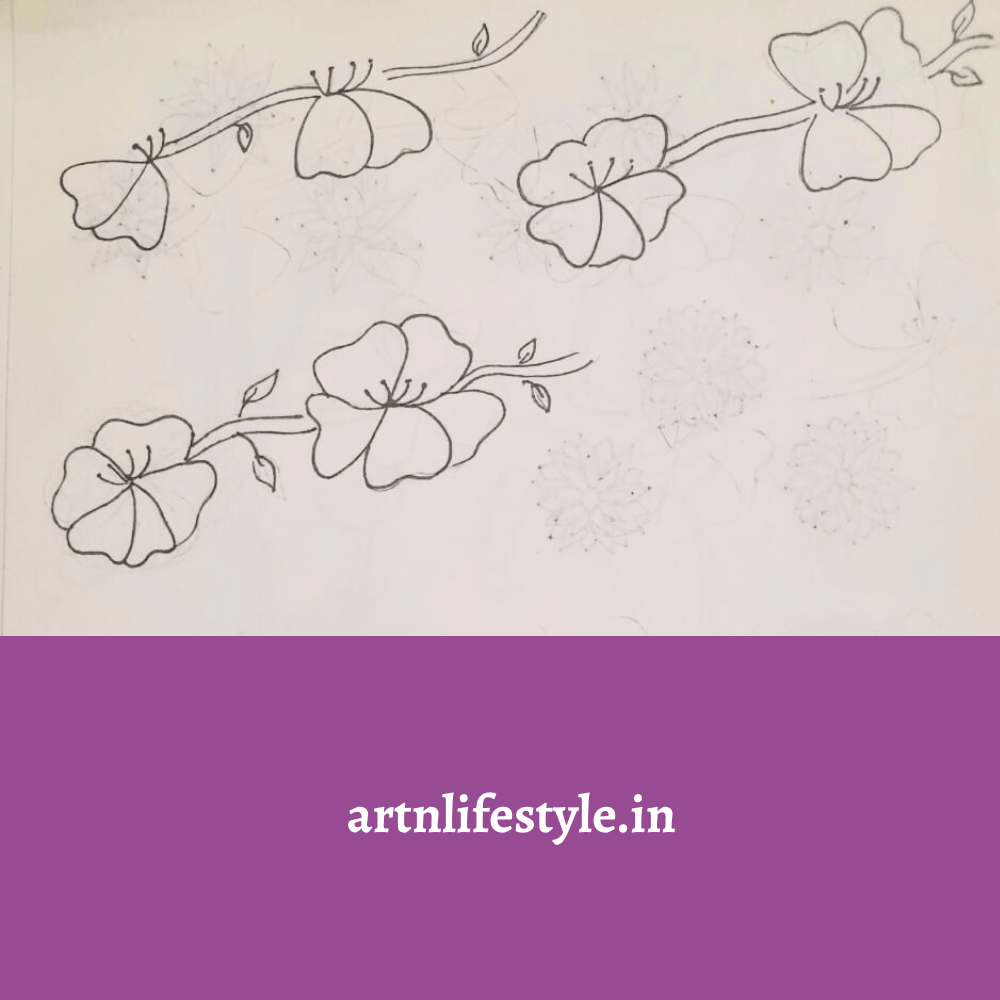
Draw the stem of the flower and the lower two petals. Next draw the upper petals and the pistil of the flower. Then draw the leaves.
9. Tulip Bunch
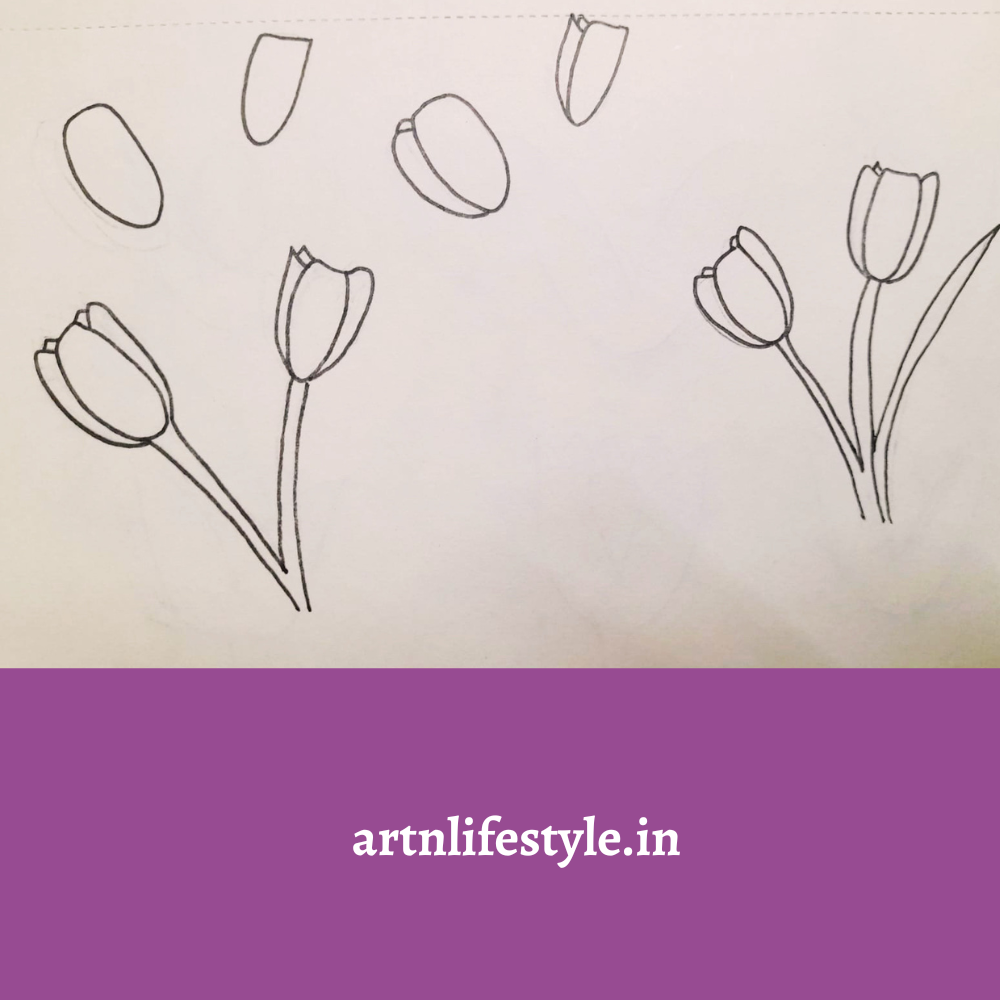
Begin with oval shapes for each tulip bud. Add a curved petal line inside each bud. Draw vertical lines to form the petals and curve the bottom to shape the flowers. Add long stems beneath each bud. Draw two long, narrow leaves for a natural finish.
You might also like: 50+ Step by step bullet journal doodles
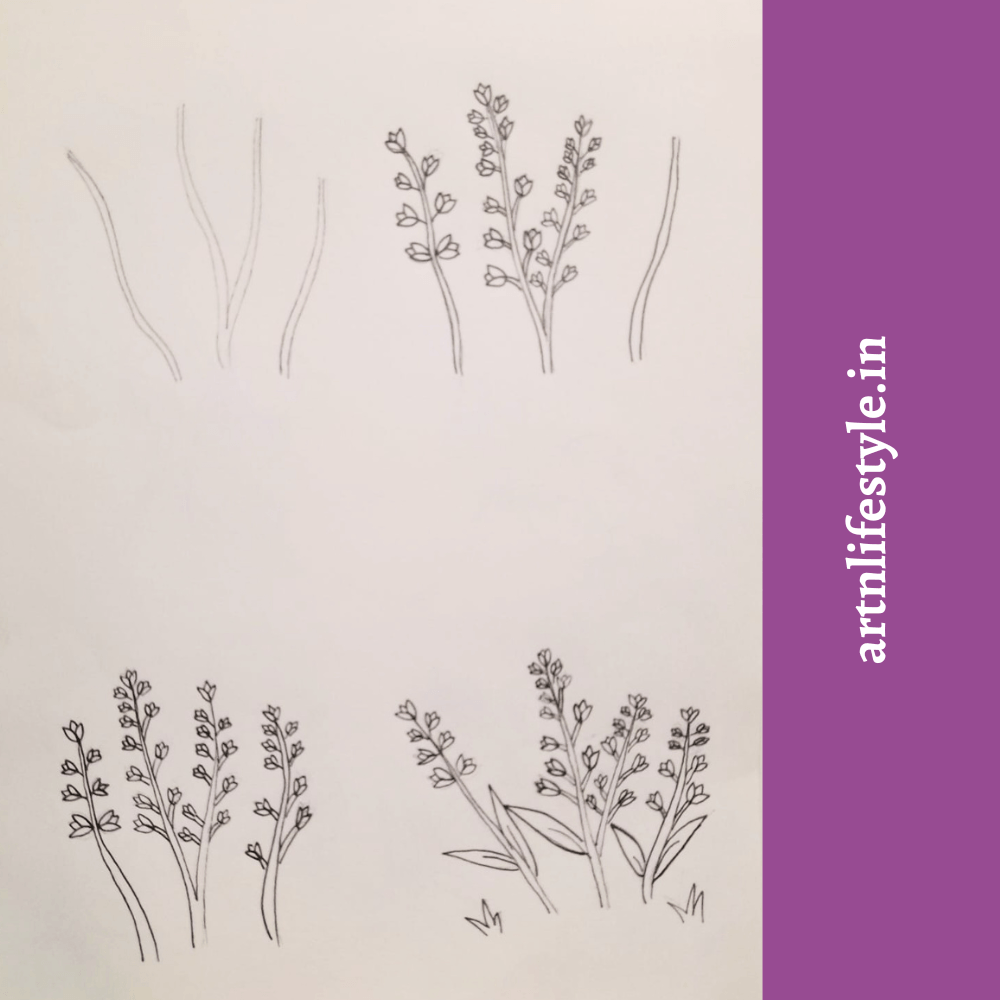
10. Orchids
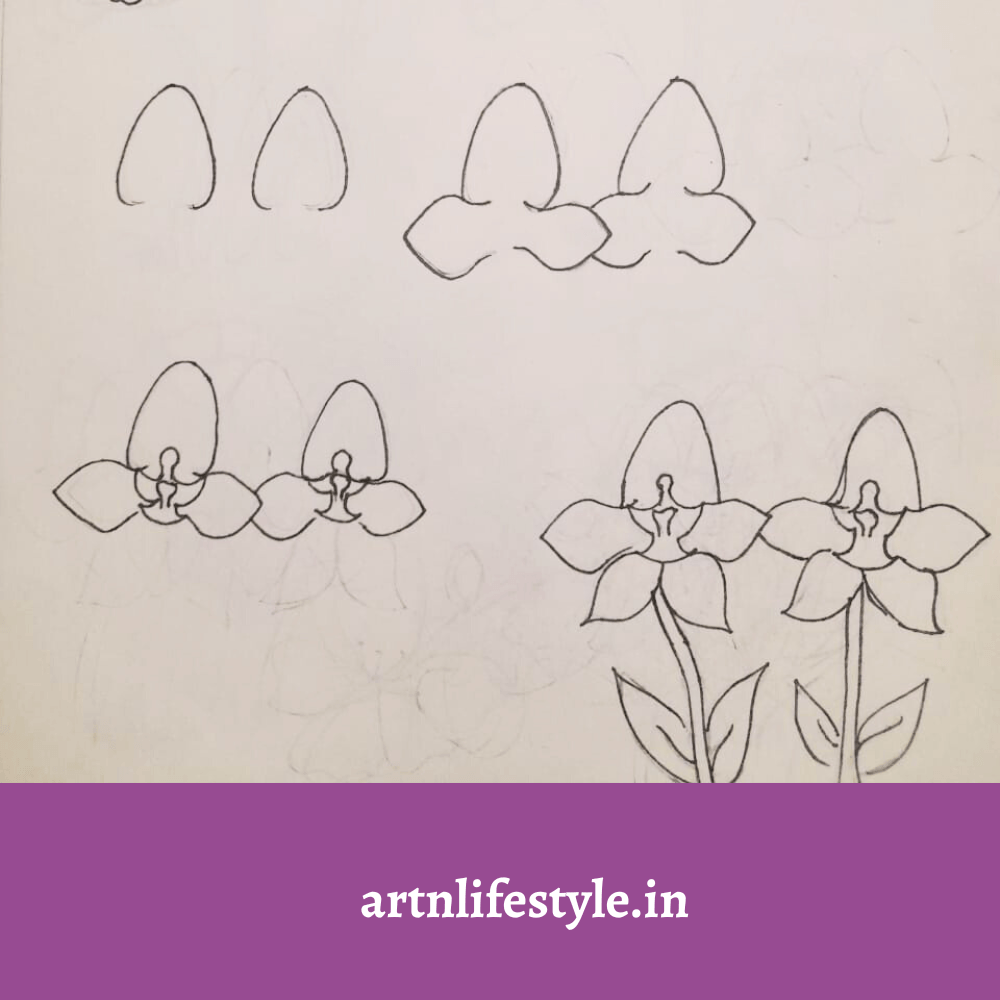
Draw the upper petals. Then draw the side petals. Next draw the column of the flowers. Then draw the lower petals and complete the drawing by adding the stem and the leaves.
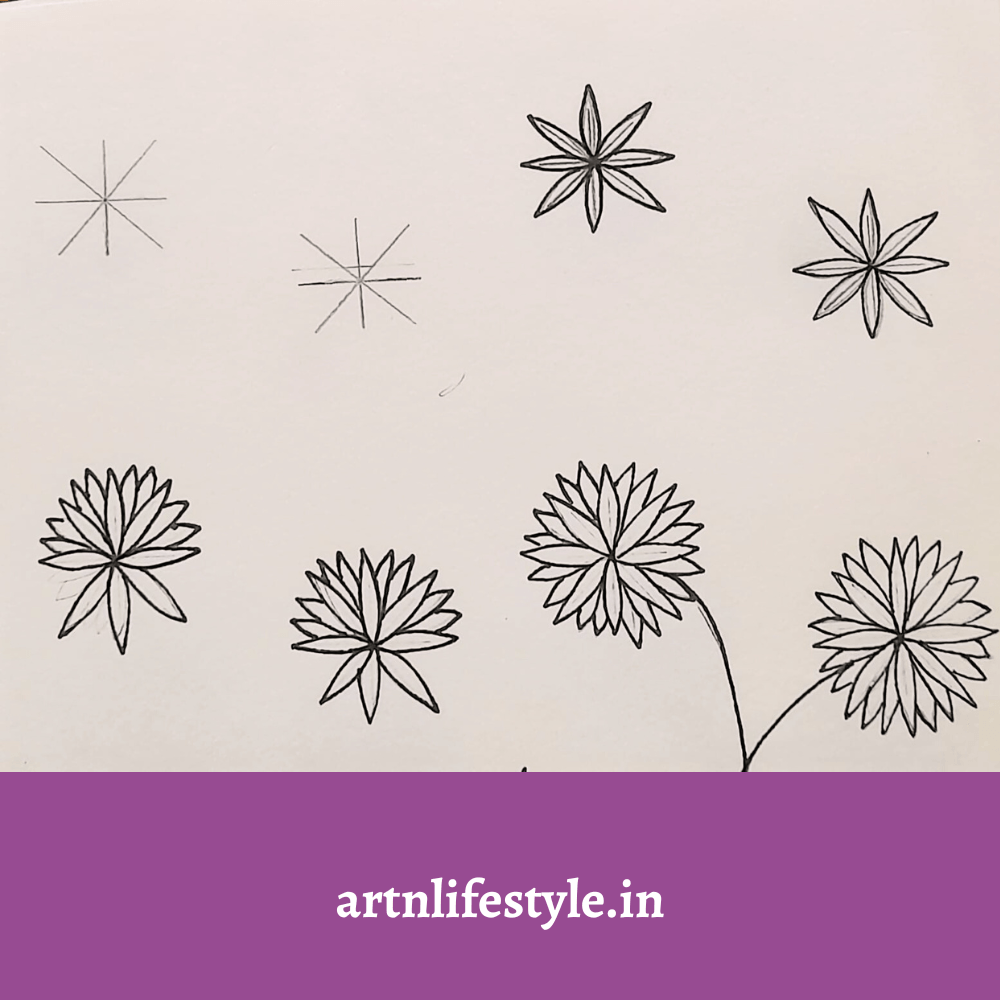
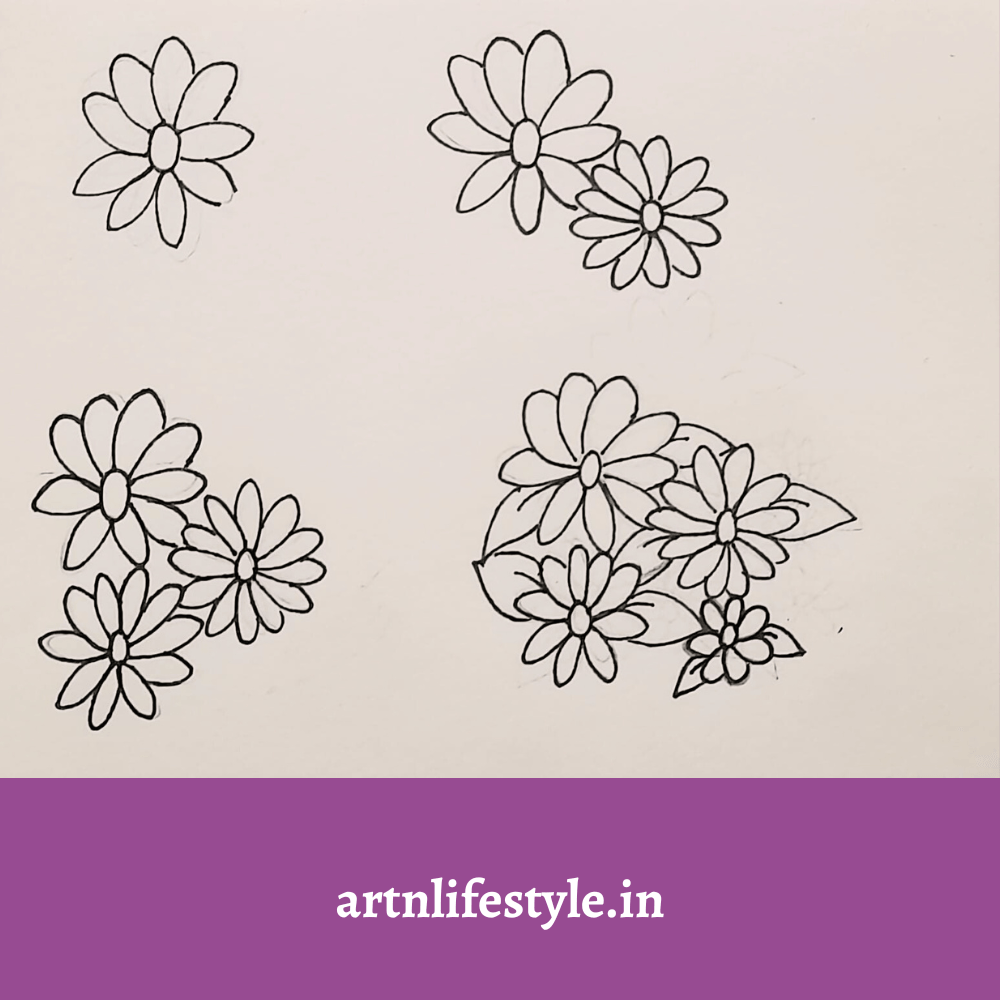
11. Daisy
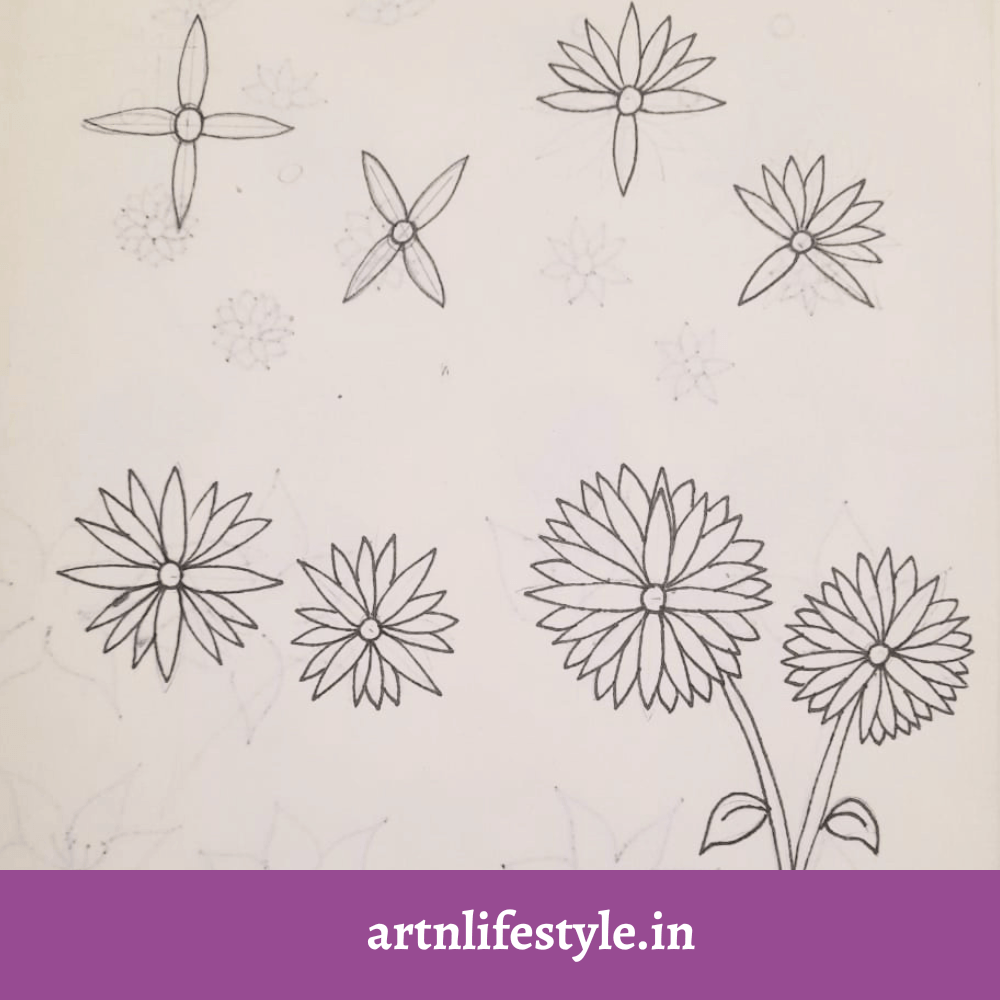
Draw a small circle in the center of the flower and draw a vertical and horizontal line crossing at the center. and four petals in the four sides of the circle. Fill the gaps with offset petals. Build an inner petal layer buy drawing more offset petals to give fullness. Then complete the drawing by adding the stems and the leaves. Erase the vertical and horizontal lines.
You might also like: 20+ Easy and Cute birthday drawing ideas
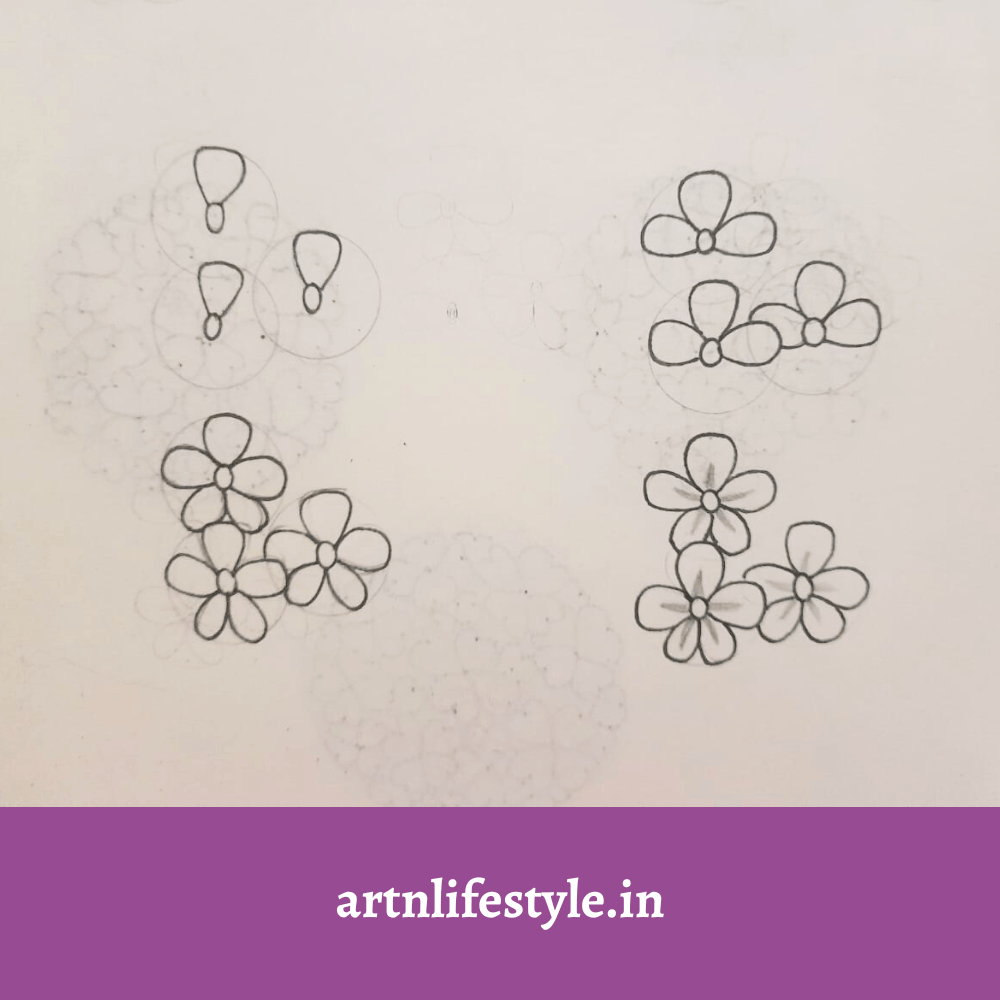
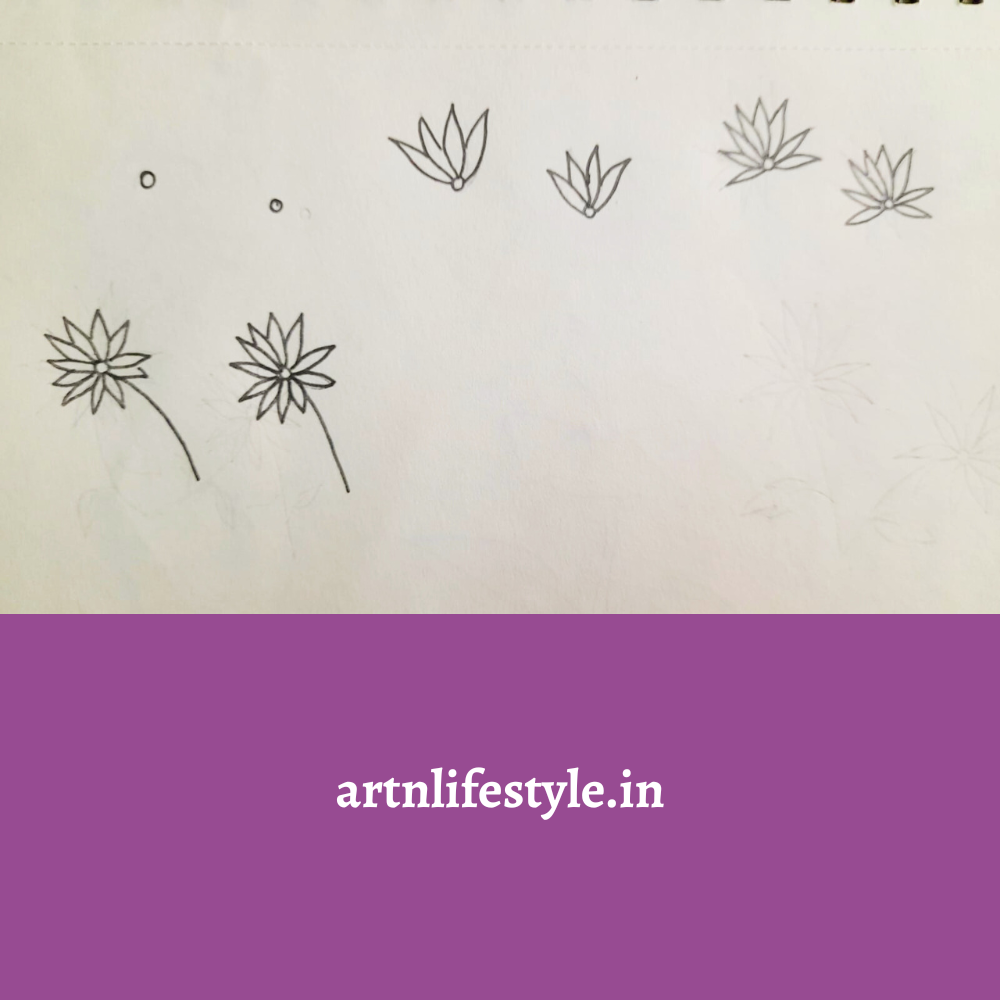
12. Mini Heart Petal Flowers
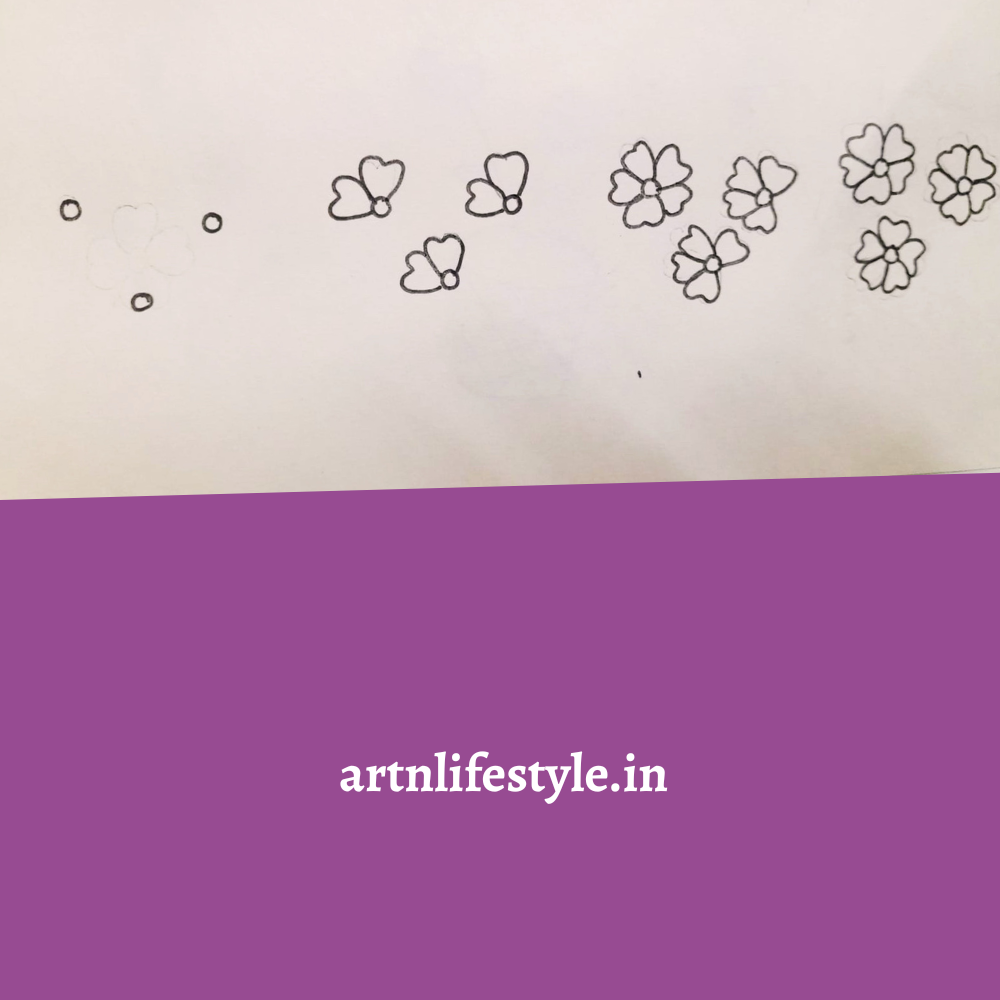
Start with a tiny circle in the center. Draw five heart-shaped petals around it. Repeat this for multiple flowers in a line. Make sure petals face outward and slightly overlap. You’ll have a neat row of small, blooming flowers.
13. Forget me flowers
Draw three light circles using a stencil, then draw a three small circles for the flower’s center. Then draw the upper petal.Next draw the side petals. Then draw the two petals in the bottom. Once your flower drawing is completed, you can erase the light circles you have drawn.
14. Three Flower Bunch
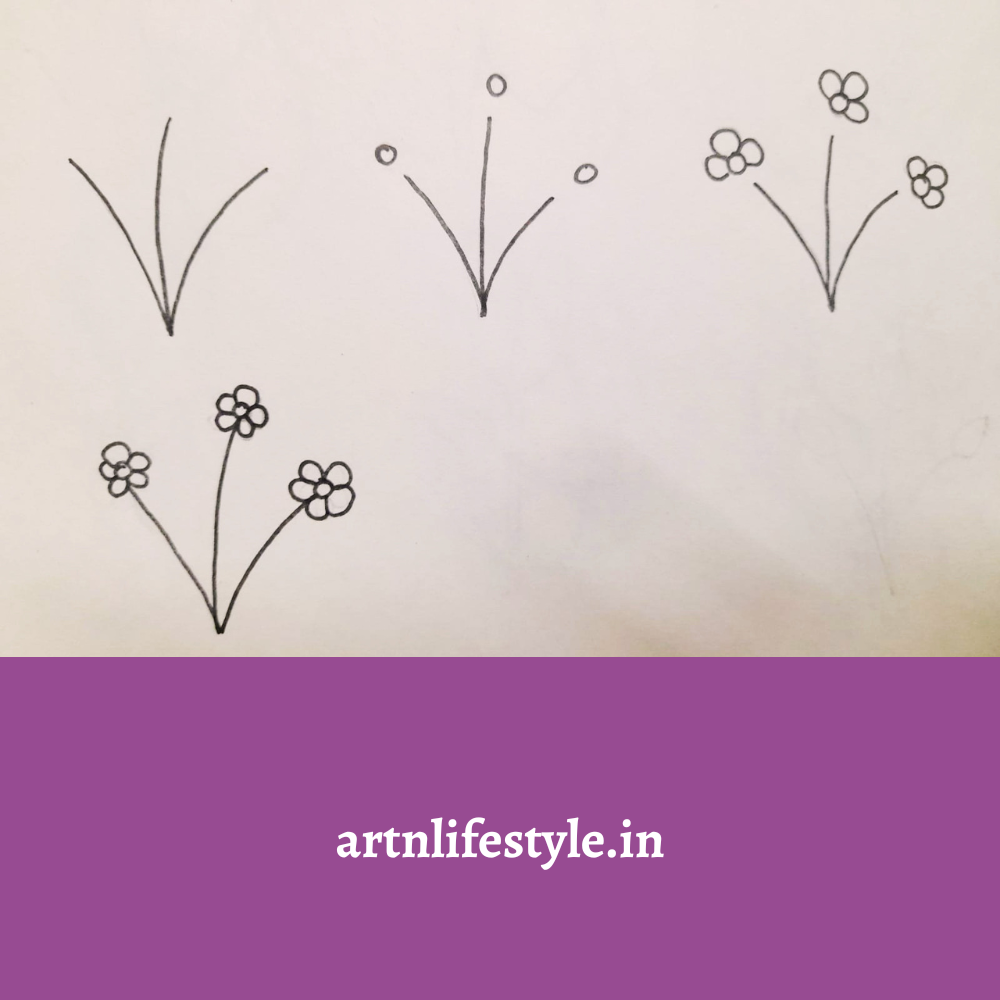
Draw three slightly curved lines coming from one point. At the top of each line, draw small circles. Surround each circle with five tiny round petals. Complete the bunch by darkening the outlines and connecting the stems smoothly.
15. Simple petal flower
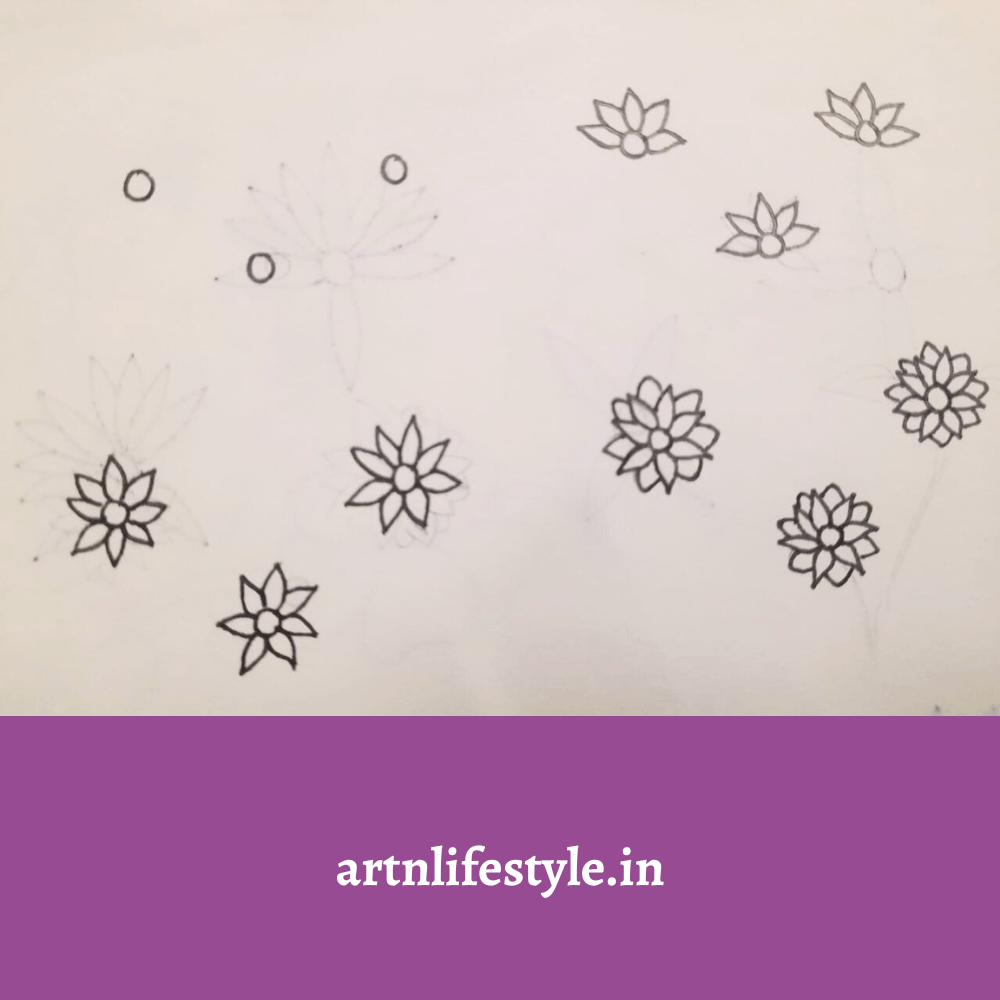
Draw 3 small circles for the flower’s center. Then draw the upper four petals. Next draw the lower 3 petals. For fullness draw second layer of petals between the first layer of petals.
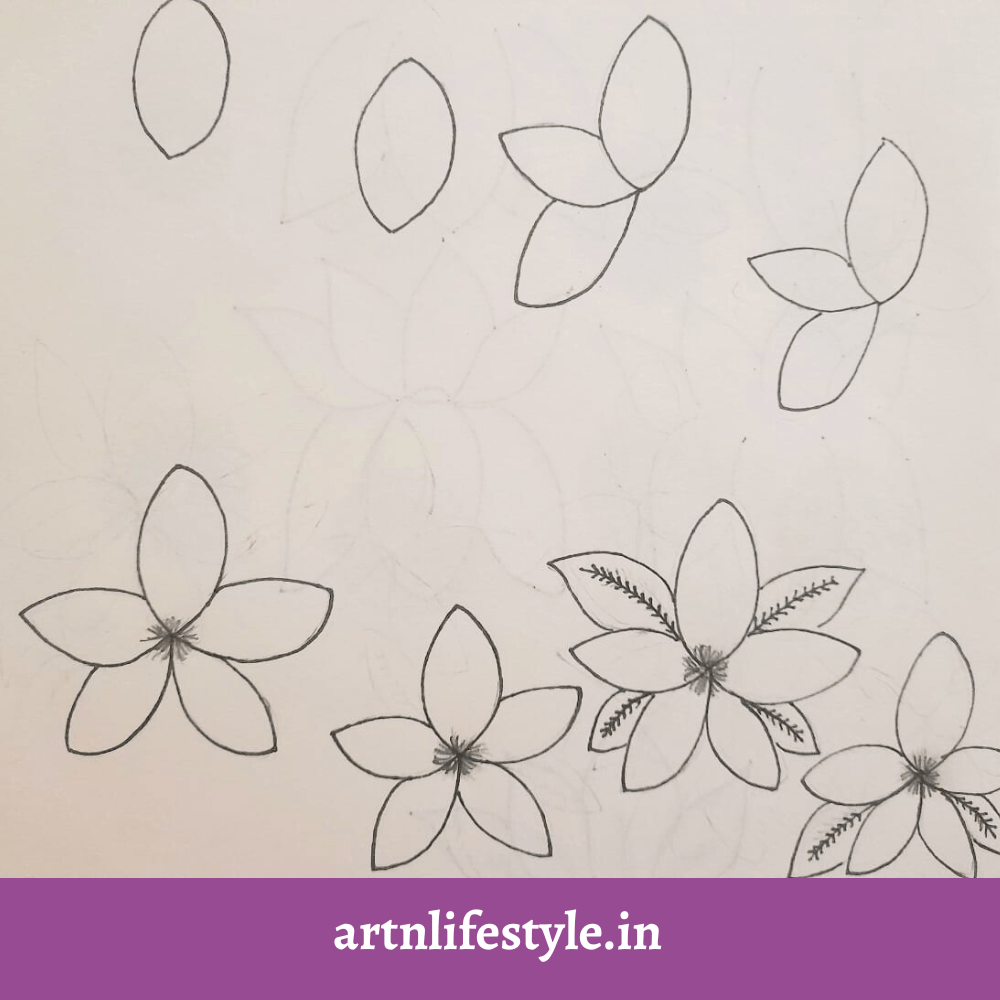
16. Jasmine flowers
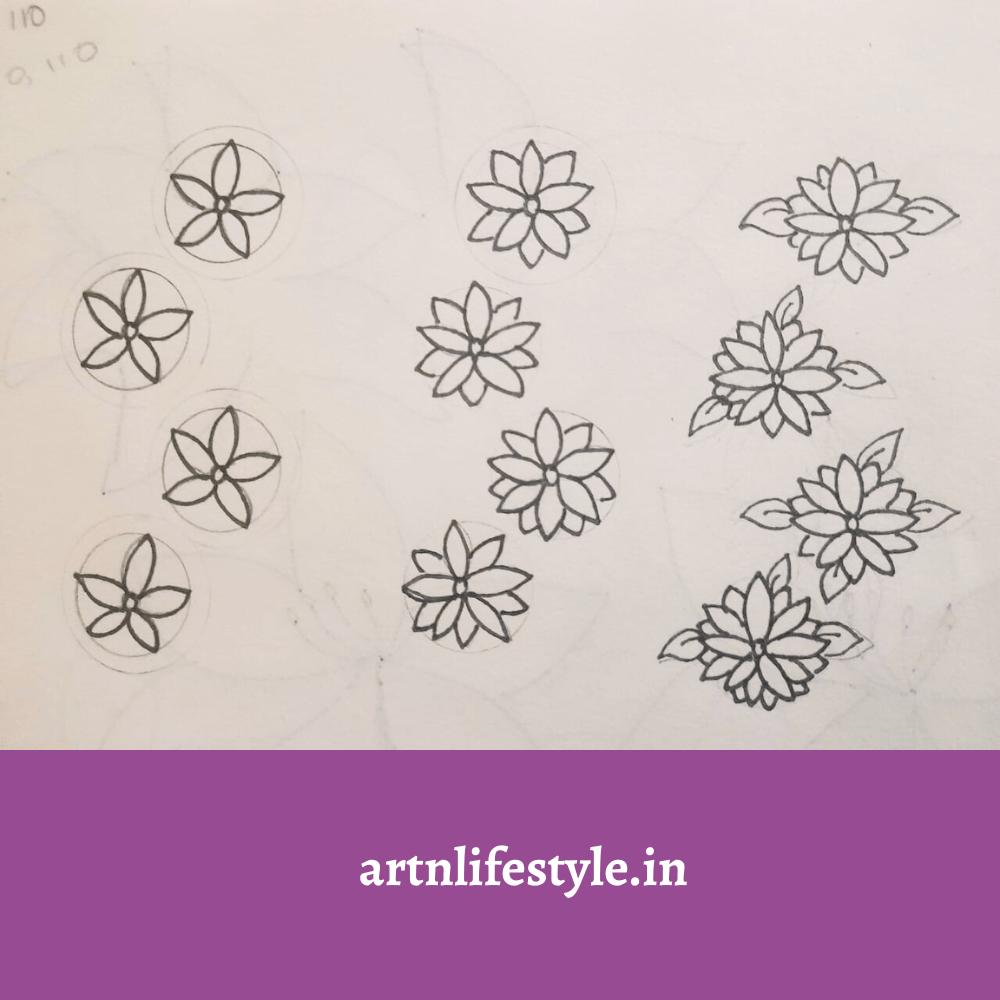
Draw 3 light circles. Next draw a small circle in the center of these circles. Then draw five petals around the circle. Draw the inner petal layer to give a fullness. Then draw the leaves around the flowers.
17. Simple Tulip
Draw three curved lines branching upward. Add oval buds at the tip of each line. Outline the front petals with open shapes. Add vertical stems to connect each bud to the base. You can leave it clean or add long leaves to finish the tulips.
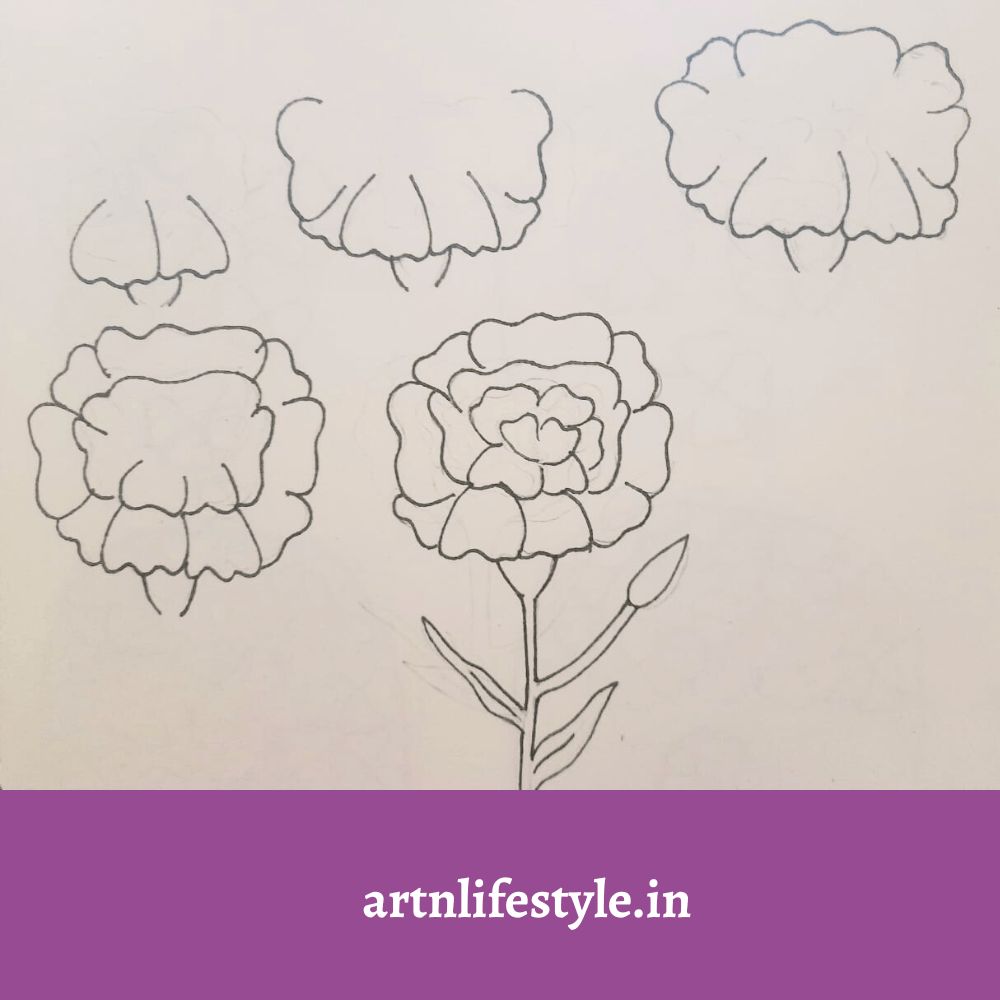
18. Carnation
19. Layered Petal Flower
Start with a small dot for the center. Draw four pointed petals around it. Add more petals behind, overlapping slightly. Keep layering to form a full bloom. Complete with a bent stem for a graceful flower look.
20. Cosmos
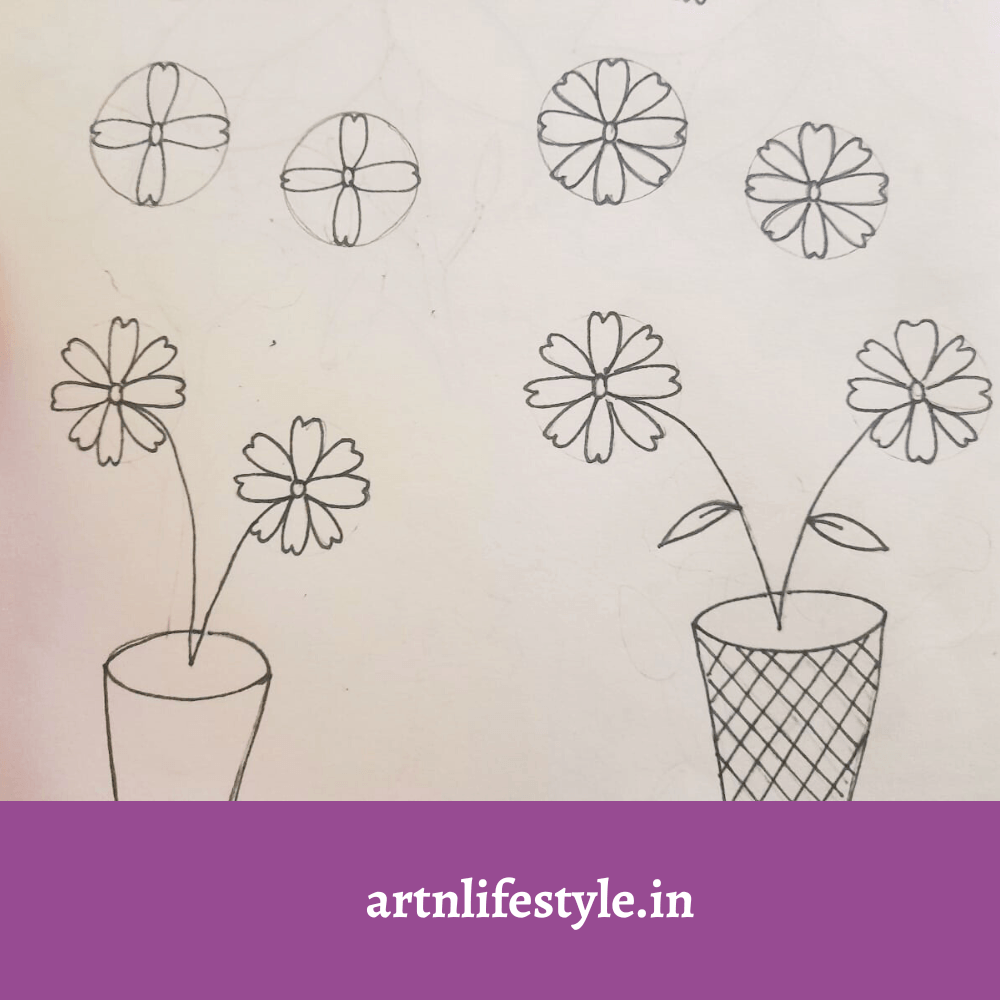
Draw 2 small light circles. Draw small circles for the flowers center. Draw the first four petals. Next draw the other 4 petals. Then draw the stem and the outline of the pot. Then add the leaves and final touches for the pot.
You might also like: 20+ Cute food drawing ideas
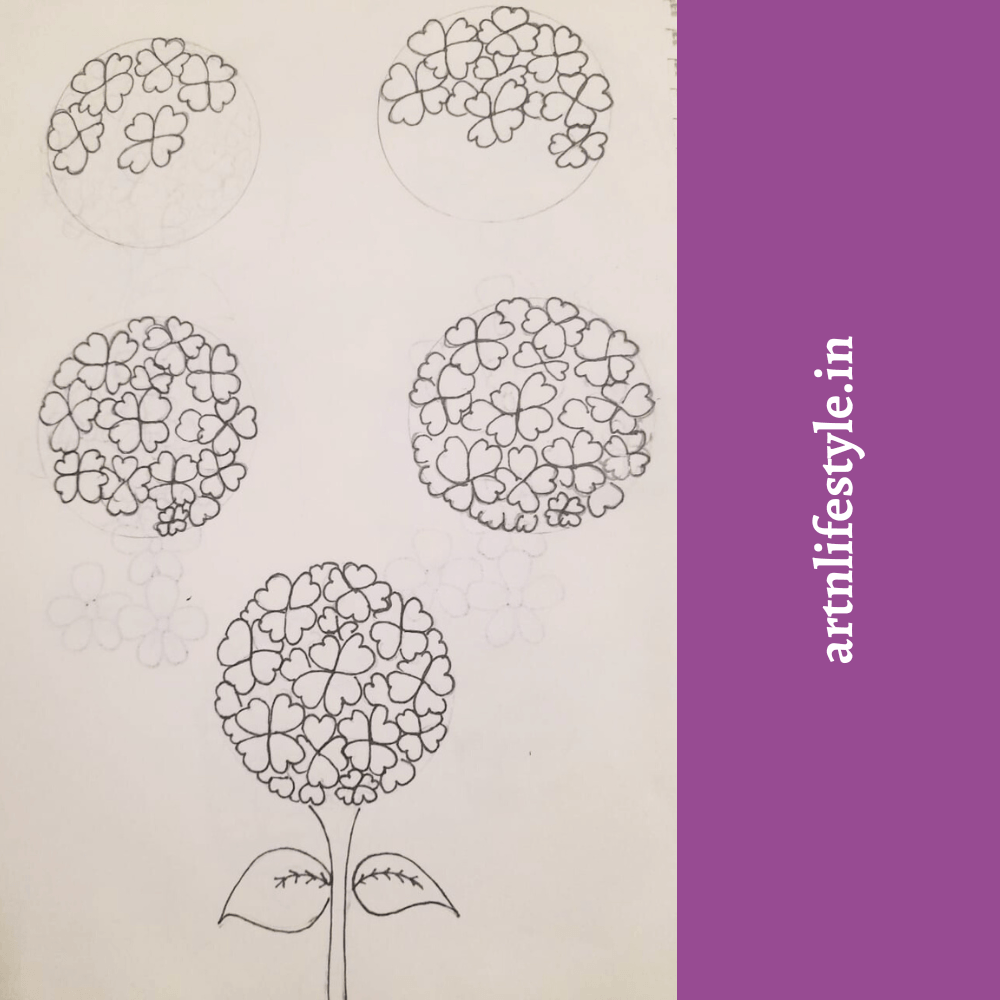
21.Hydrangea
22. Sunflower facing upwards
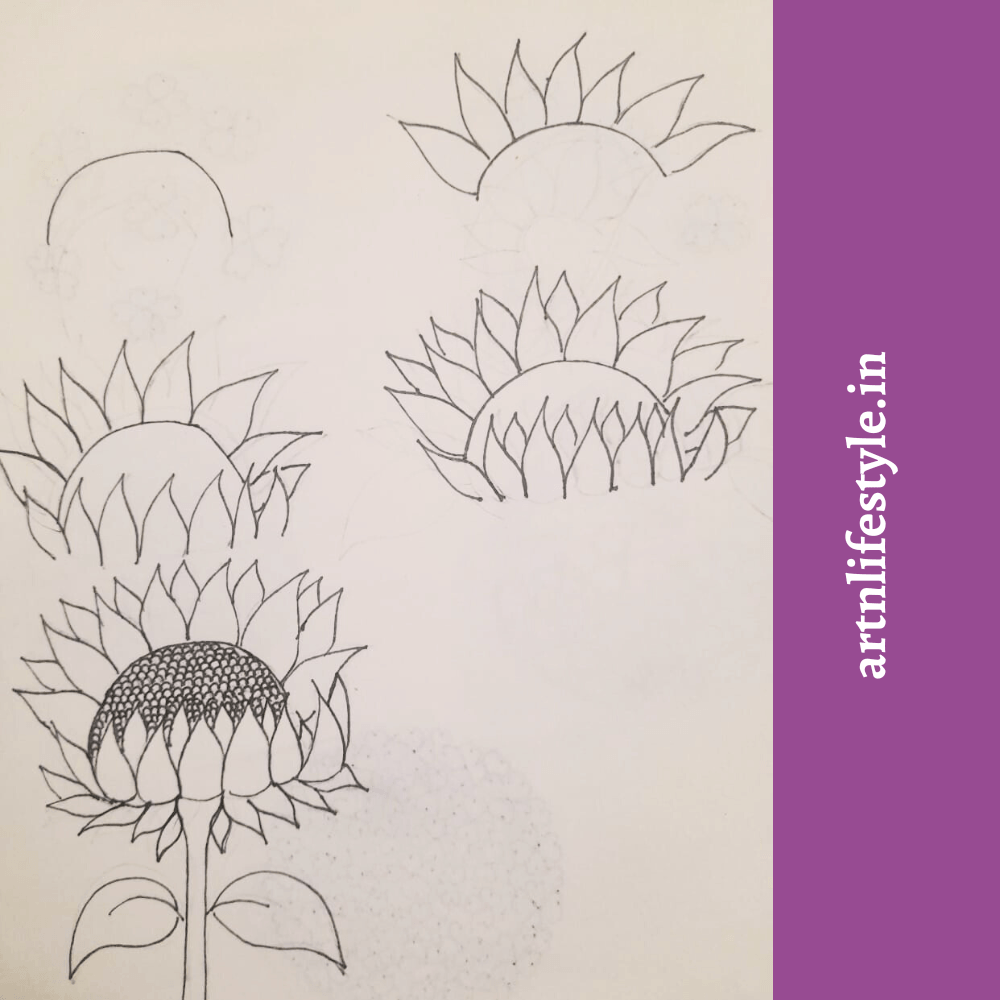
Draw a half circle. Then draw the upper petals. Then draw the lower petals facing upwards.Then add fullness by drawing inner layer of the petals. Next draw the stem and the leaves of the sunflower. Then draw the disc florets.
You might also like: Cute animal drawings for kids.
23 Iris

Draw a single petal pointing downwards. Next draw the petals on either side of the petal. Then draw the upper petals of the flower. Draw a half circle in the center. Then draw the stem the bud and the leaves. Slightly darken the center of the petals.
24. Hawaii flowers
Draw a single upper petal. Then draw the 2 other petals. Next complete the other 2 petals. Colour the center of the flower. Next draw the leaves.
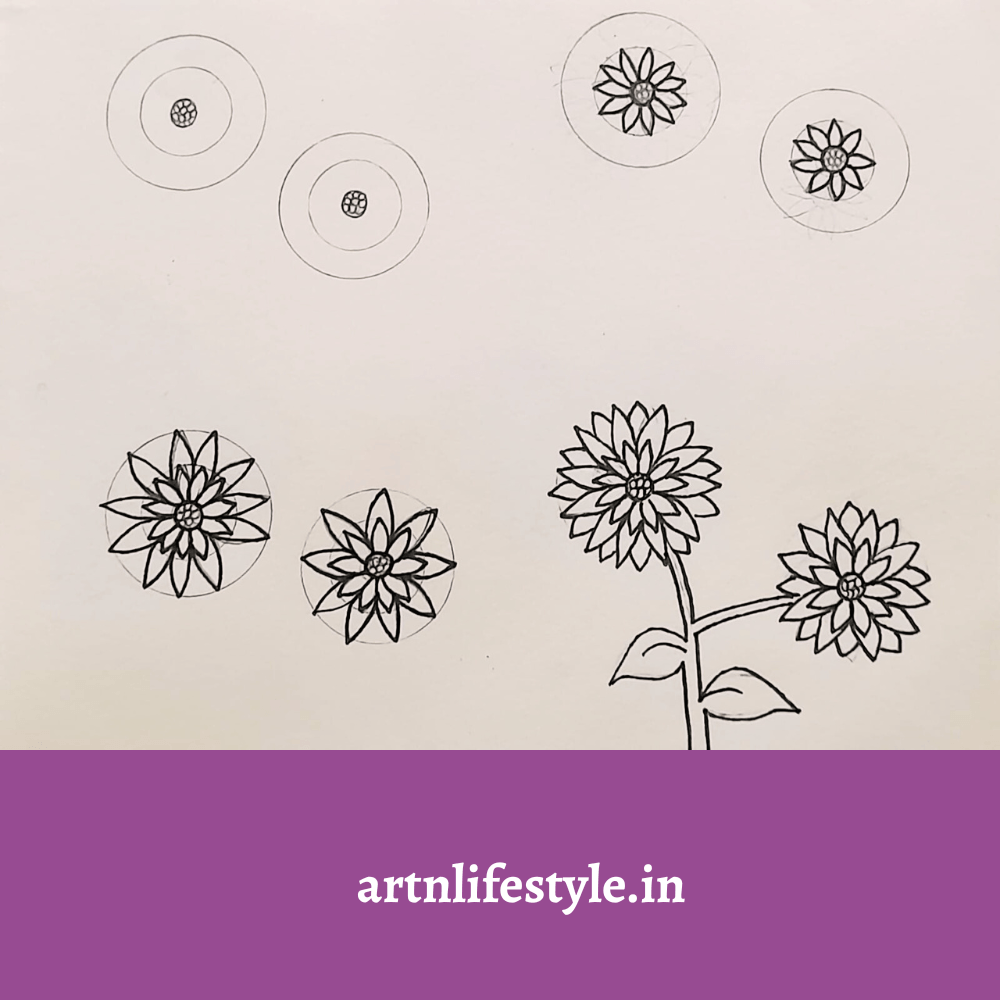
25. Dahlia
26. Lillies
27. Chrysanthemum flower
28. Daisy floral patterns
29. Lupin
30. Cherry blossom flowers

31. Tulip flowers
32. Oleander flowers
33.Vinca flowers
Conclusion:
Drawing flowers doesn’t have to be complicated—just a few guided steps can bring your artwork to life. Whether you’re practicing for fun or adding floral charm to your doodles, these easy flower drawings will help you bloom with confidence. Keep practicing and soon you’ll be sketching your own flower designs effortlessly!

Read more: