
How to draw a carrot
*This post may contain affiliate links. This means when you click on a link and make a purchase we may earn a commission at no additional cost to you. Our goal is to provide valuable and helpful content. Any commission made can help us maintain this site and provide more quality and helpful content for our readers.*
Carrots are simple drawings that are perfect for kids. This article describes 5 step by step drawing guides to draw a carrot. Use a pencil to draw the sketch lightly. Once your sketch is complete, you can use a micropen to draw over the sketch. Then use an eraser to remove the pencil drawing.
Materials you need
1.Sketchbook
2.pencil
3.eraser
4.Micropen
How to draw a simple carrot
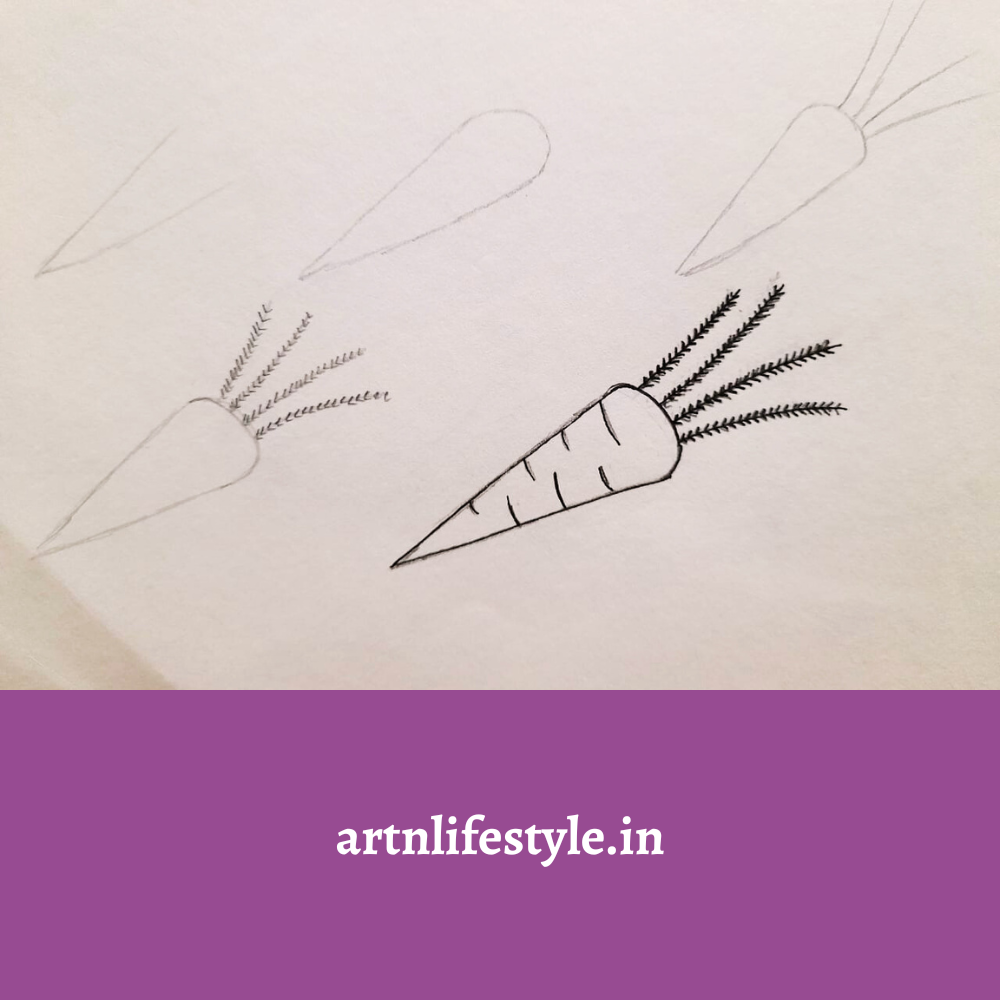
- Draw a slanting V letter
- Next close the V with a curved line as shown in the image
- Next draw 4 vertical lines that on top of the curved line
- Then draw tiny arrows on the vertical lines as shown in the image. The arrows should face towards the carrot’s head.
- Finally use a micro pen to draw on your completed sketch.
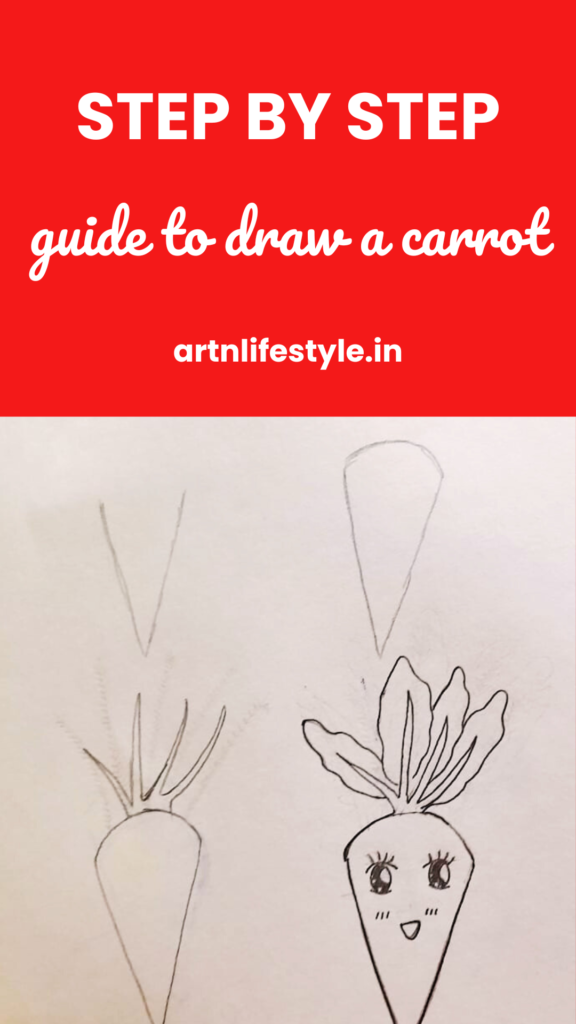
How to kawaii carrot
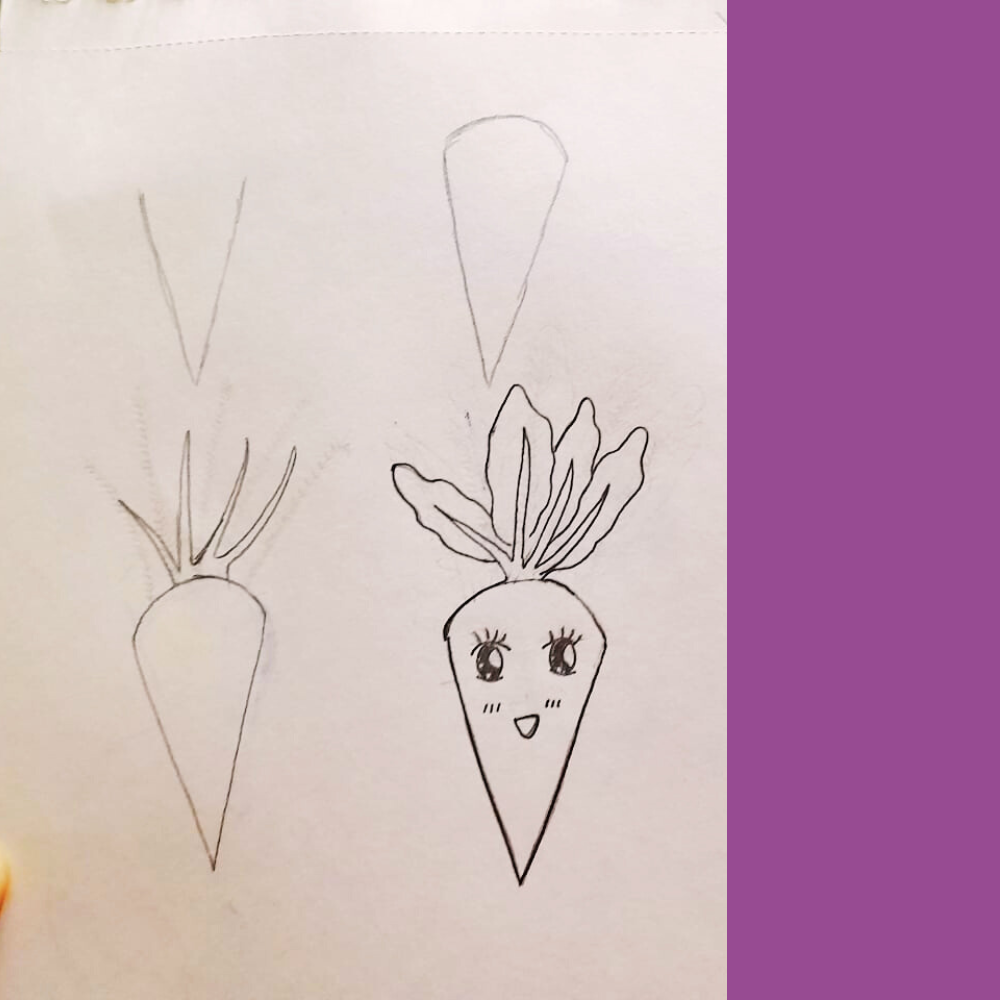
- Draw a V letter
- Next close the letter with a curved line
- Next draw the stems as shown in the image.
- Next draw the leaves around the stem of the carrot and add the facial features of the carrot.
- Finally use a micro pen to draw on the sketch.
How to draw carrots growing in a pot
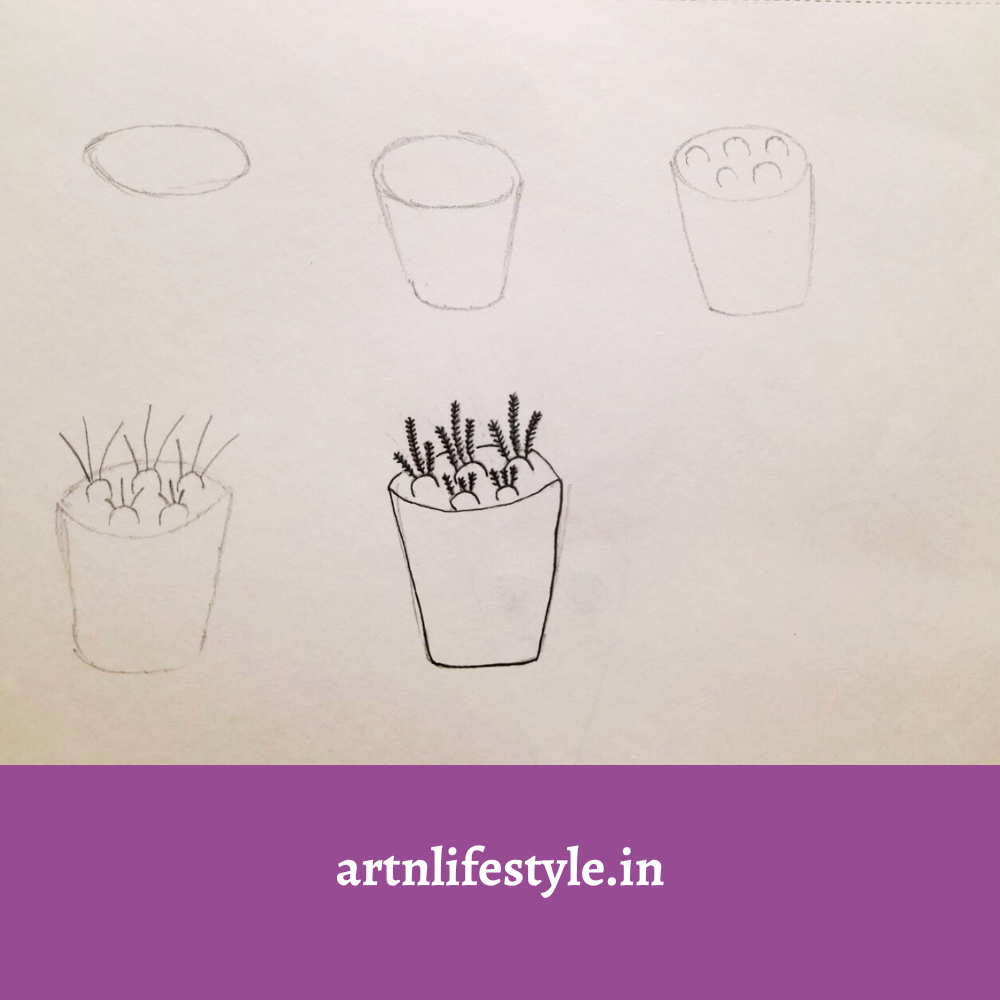
- First draw a oval shape
- Next draw the pot as shown in the image.
- Then draw small carrot heads in the pot.
- Then draw 3 vertical lines on each carrot head.
- Then draw tiny arrows on the vertical lines as shown in the image. The arrows should face towards the carrot’s head.
- Finally use a micro pen to draw on the completed sketch.
How to draw a bunny with a carrot
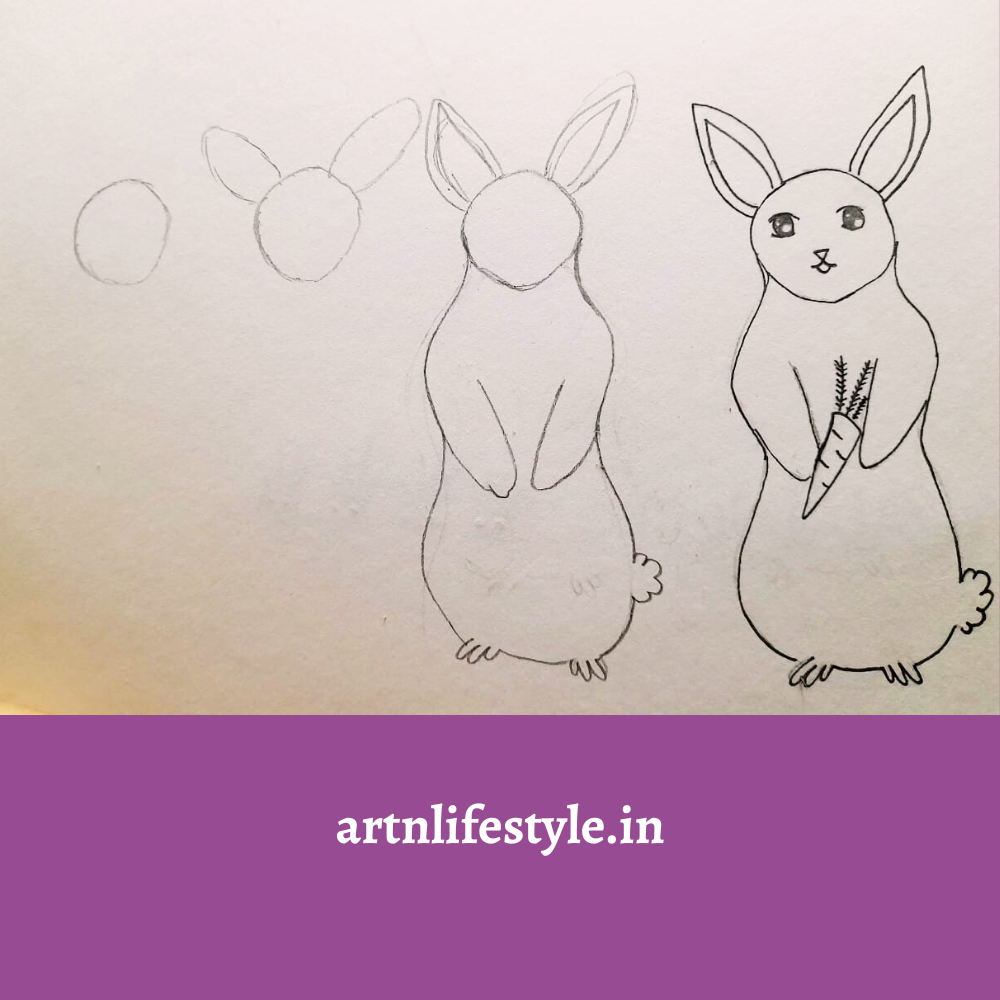
- First draw a circle
- Next draw the outline of the bunny ears
- Next draw the body of the rabbit as shown in the image
- Next draw the facial features of the rabbit and draw the carrot.
- Finally use a micro pen to draw on the sketch.
How to draw carrots growing in the ground
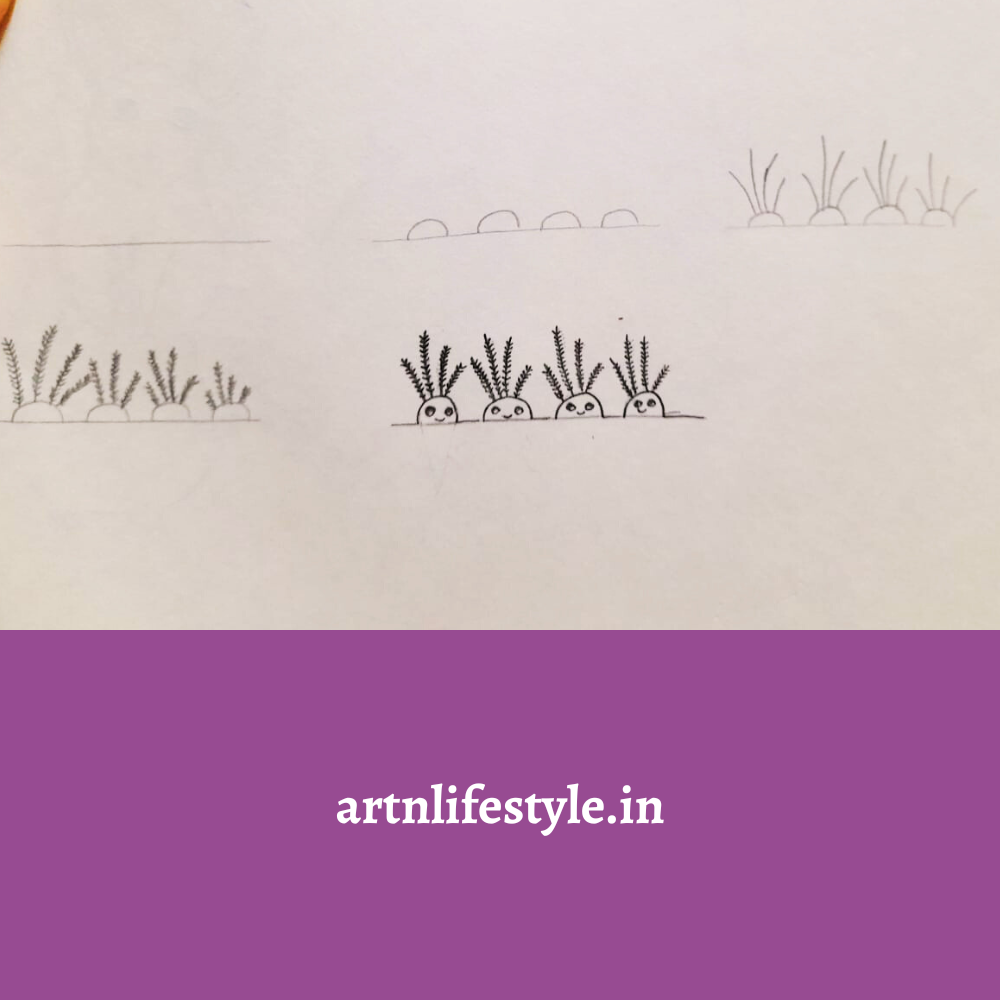
- Draw a horizontal line.
- Next draw the carrot heads
- Then draw vertical lines on the carrots head
- Then draw tiny arrows on the vertical lines as shown in the image. The arrows should face towards the carrot’s head.
- Then draw the facial features of the carrot.
- The use a micro pen to draw on the sketch.
Cool facts about carrots for kids
- Carrots are rich in beta carotene which can improve eye, bone and skin health.
- Native carrots used to be purple, white or yellow colour. People of netherlands purposely bred them to be orange as a tribute to the royal family.
- Carrots are made up of 88% of water making them a great hydrating food.
Conclusion
Now you have learnt how to draw a carrot. With some more practice you can try adding different angles, more detail and different angles to your drawings. Check out other drawing ideas and drawing tutorials below.
Read more: