Easy graduation cap drawing
*This post may contain affiliate links. This means when you click on a link and make a purchase we may earn a commission at no additional cost to you. Our goal is to provide valuable and helpful content. Any commission made can help us maintain this site and provide more quality and helpful content for our readers.*
Graduation is a milestone that marks the ending of a chapter and the beginning of a new one. Graduation caps are symbols of academic achievement and the transition from a student to a graduate. Drawing a graduation cap can be a fun experience. Here is an easy drawing tutorial that is perfect for kids and beginners. Use a pencil to draw a light sketch, next use a micro pen to draw over it and then use the eraser to remove the pencil sketch.
Materials needed
- Pencil
- A sketchbook
- An eraser
- A micropen (0.25mm)
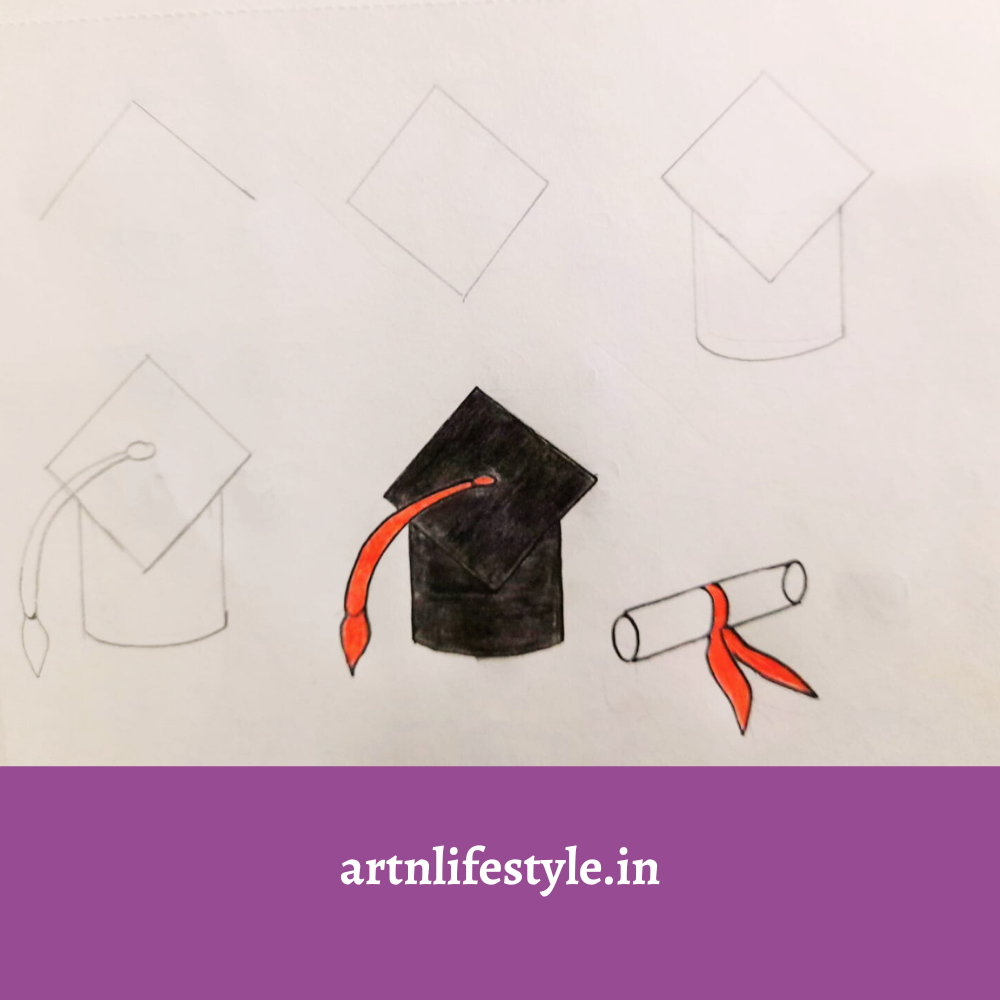
Step by step graduation cap drawing:
- First draw a rhombus as shown in the image
- Next draw two parallel lines below the diamond
- Draw a small oval circle in the center of the diamond
- Then draw the rope from the oval shape
- Your graduation cap drawing is now ready. You can then draw the graduation certificate as shown in the image.
- Finally add your favourite colours to your graduation cap.
History of the graduation cap
In the medieval times, the graduation cap was called as motarboard and was commonly wore by scholars who were a part of the clergy. These scholars wore long robes and flat square shaped caps. The cap symbolized intellect, learning and discipline. Overtime as universities became more secular the cap became a symbol of scholarship rather than religion. In the 16th and 17th century, the academic dress and motarboard became standardized in all universities especially in england. Then the tassel was added mainly as a decorative element and to symbolize the transition from student to graduate.
Conclusion:
Congratulations! You’ve successfully completed your drawing by following these simple steps. Whether you’re sketching for fun or designing a personalized graduation card, this process allows you to express your unique style. Keep practicing, experiment with different colors, and let your creativity shine through your artwork.
Read more: