How to draw a deer for kids
*This post may contain affiliate links. This means when you click on a link and make a purchase we may earn a commission at no additional cost to you. Our goal is to provide valuable and helpful content. Any commission made can help us maintain this site and provide more quality and helpful content for our readers.*
Introduction
One of the majestic and graceful creatures are deers. Their elegant posture, gentle eyes and distinctive antlers makes them a perfect subject to draw. This article focuses on how to draw a deer for kids. These steps are easy to follow. So what are you waiting for? Grab your pencil and paper and let’s embark on this artistic journey!
How to draw a deer for kids
1. Draw a deer’s face
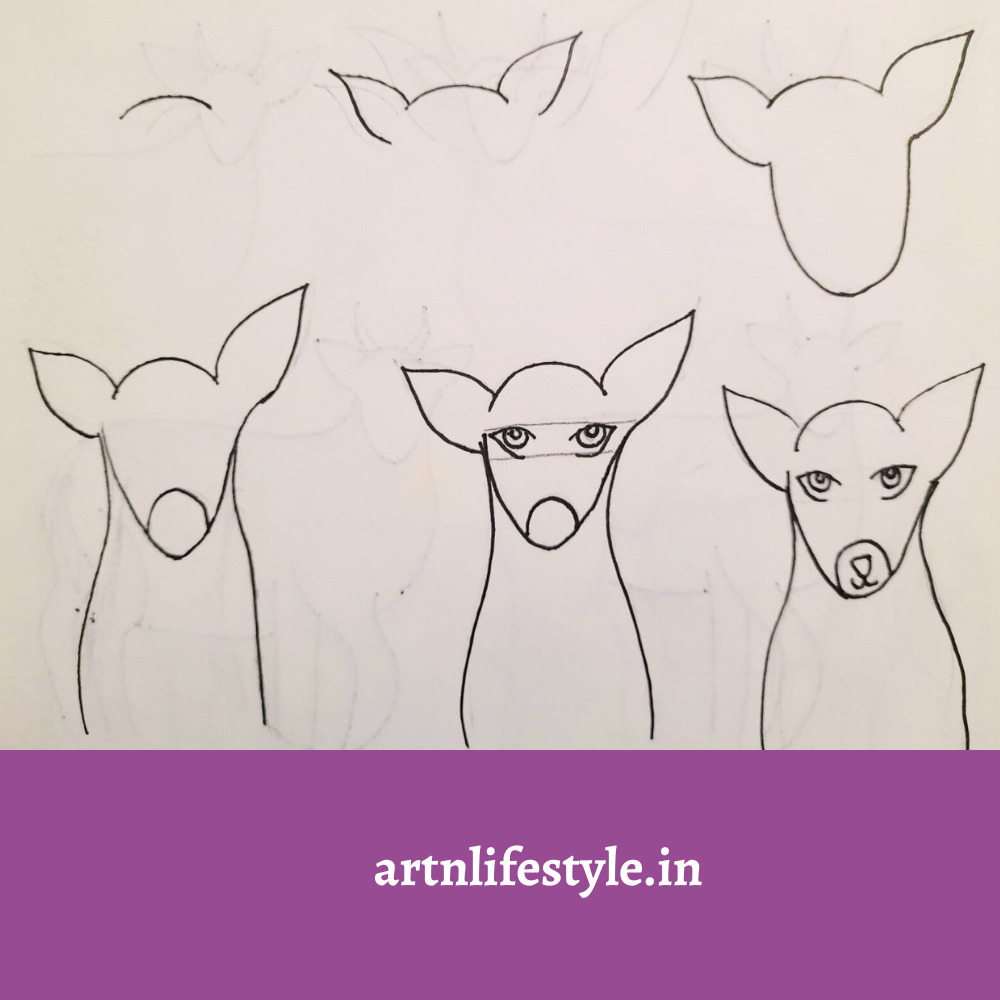
Start by drawing the outline of the deer’s head and then add the ears. Then complete the deer’s face.Next draw the deer’s mouth. Then draw the body of the deer and draw the deer’s eyes. Then complete the facial features of the deer. Finally add the details on the facial features.
2. Draw a deer grazing
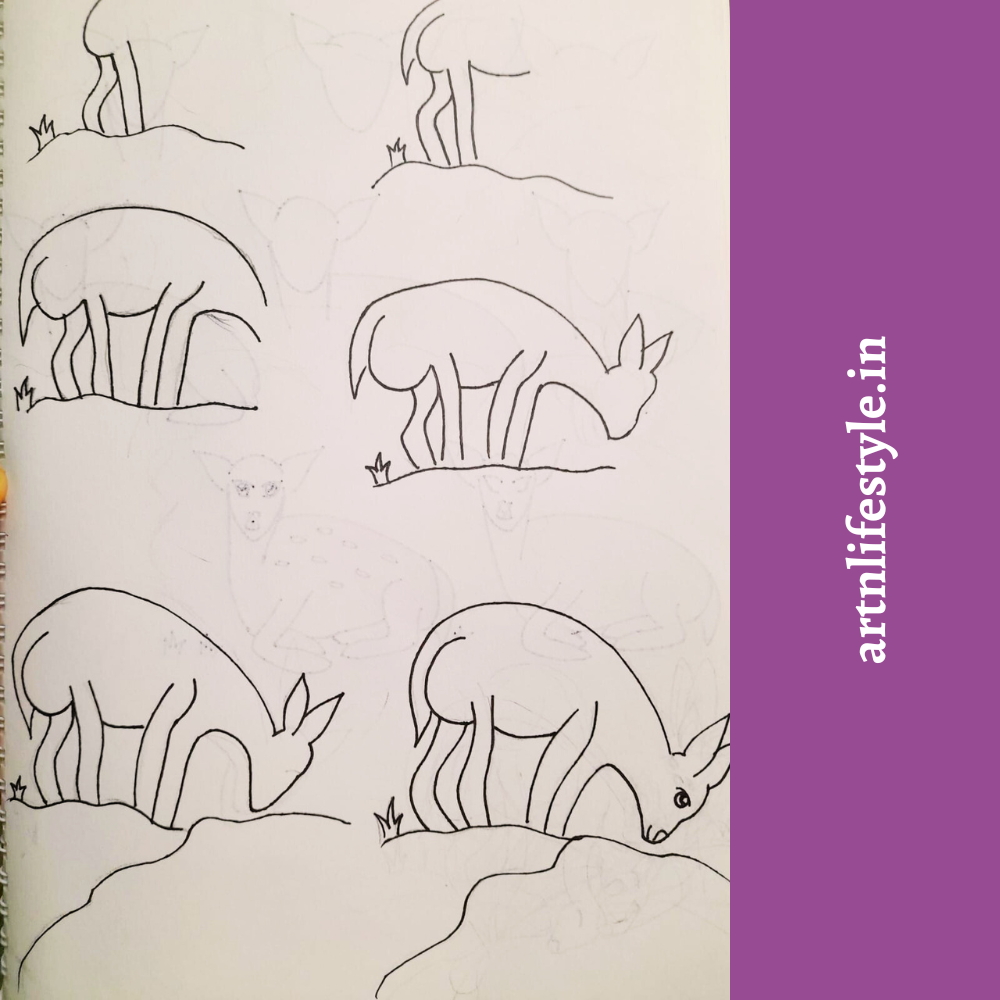
Here is a step by step guide to draw a deer grazing. Start by drawing the lower back and the hind legs. Then draw the tail. Next draw the fore legs and the front portion of the deer. Then draw the outline of the lowered head of the deer and the ears. Then draw the moving water. Finally add the eyes and the mouth of the deer. Add the elements such as the grass.
3. Deer laying down
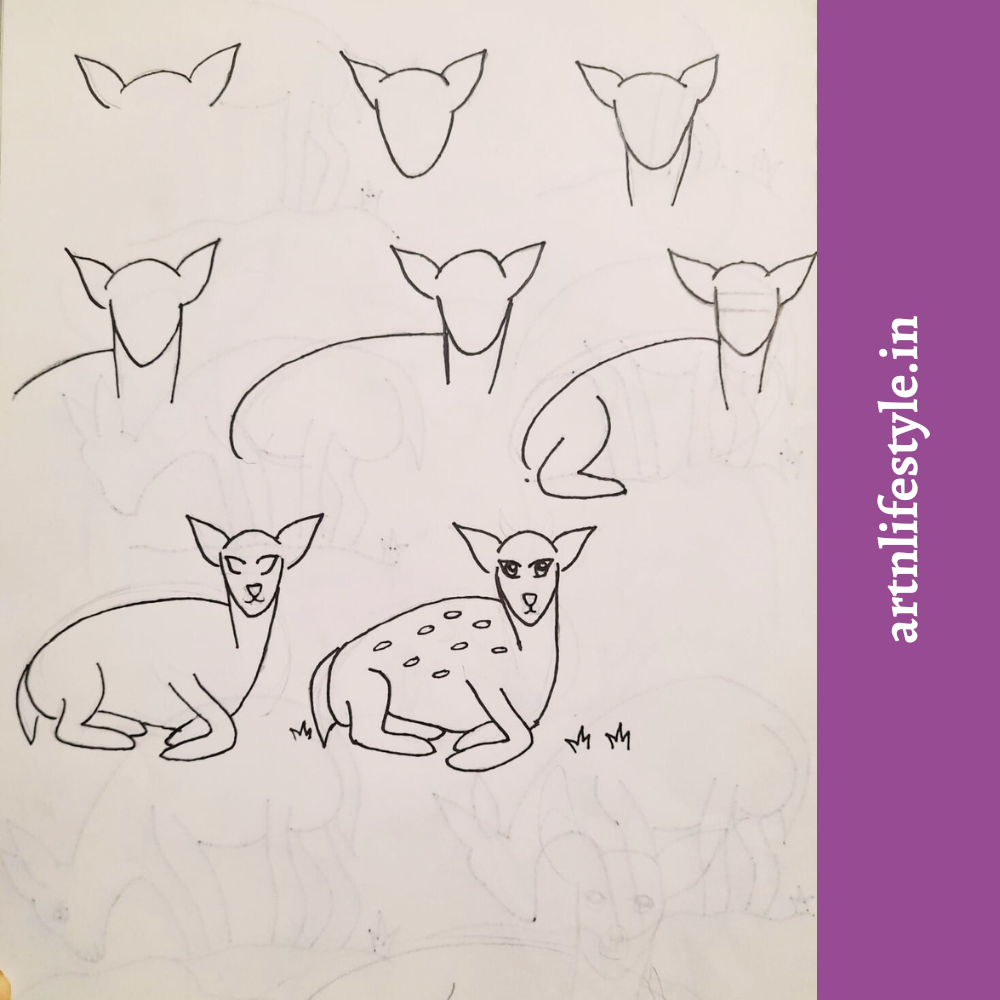
Here is a step by step guide of a deer sitting on the grass. Start by drawing the outline of the head and the ears of the deer. Then complete the outline of the face of the deer. Next draw the neck and the outline of the body of the deer. Then draw the legs of the deer. Then draw the eyes, nose and the mouth of the deer. Then add the details such as the deer eyes and the patches on the deer’s body.
4. Deer standing
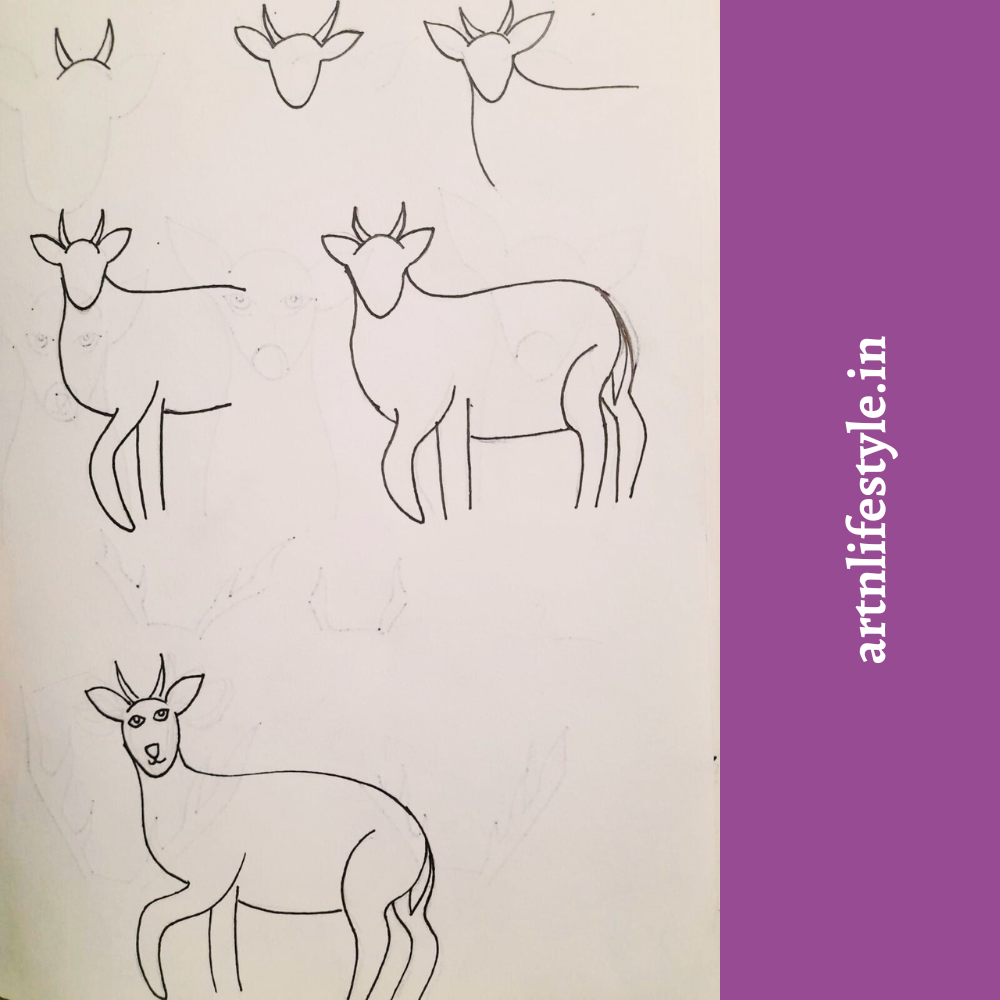
Here you’ll learn to draw a standing deer. Start by drawing the head, horns and the ears of the deer. Next draw the outline of the deer’s face. Next draw the upper body and the fore limbs of the deer. Then draw the lower part of the body and the hind limbs of the deer. Next draw the facial features of the deer.
5. Draw deer antlers
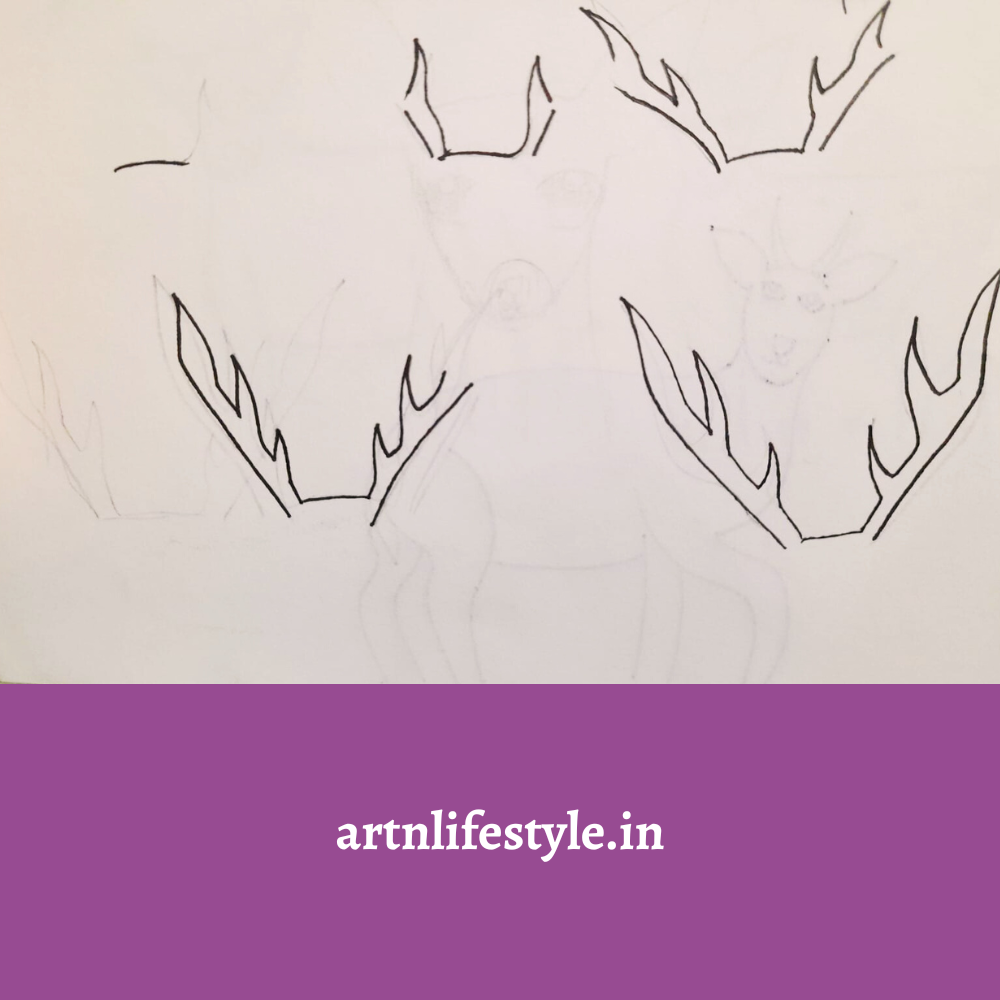
Here we will learn how to draw a deer’s antlers step by step. Start by drawing a small flat line and draw the lower part of the antler. Next branch them out to create the main antlers shapes. Add more curves and splits making them natural and symmetrical.
Conclusion
Congrats on learning how to draw a deer. Keep experimenting with different poses and styles. Check out other drawing tutorials and ideas below.
Read more: